 Prev
Prev 3. Adding Grouped and Matrix Questions
 © 2013 Plum Group, Inc. All rights reserved.
1. Creating a Survey  Prev Prev |
Next  3. Adding Grouped and Matrix Questions 3. Adding Grouped and Matrix Questions |
Now that you've created your survey template, let's begin adding some questions to your survey. You can choose from any of the following question types:
Multiple Choice questions allow the user to select only one response from the answer choices. To add this question type, select Multiple Choice from the drop-down box of question types and then click the Plus button to add the multiple choice question.
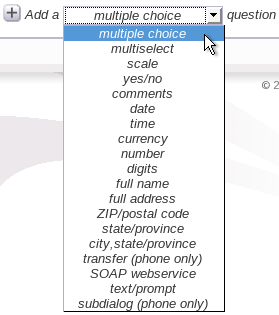
Once you have selected this question, the question will appear with the question text, "Choose one of the following: (click to edit)". To edit this question text, simply delete the text and input the question that you would like. When you are satisfied with your question, click the Add Choice button to add choices for users to select for the question.

Once you have added a choice, you can input the text for the choice under Choice Text. For Data Value, you can input the value that gets returned in your results if the user selects this choice. For Utterance, you can input the utterance that the phone listens for in the phone portion of your survey application. Please be mindful that if you are using a non-English TTS voice, you should replace the Utterance with the foreign language equivalent text. If you choose to leave Data value and Utterance blank, these sections will automatically be filled with the Choice Text that you entered. For Skip logic, you can select the page that gets skipped to if the user selects that choice after you have created all of your survey pages. See Section 6 for more information on "Skip logic".
Please note that ff you wish to change the starting number that the phone respondent would press for the choice, you can enable more options for your multiple choice question to make this change. For information on how to set up more options, see below.
Once you return to your multiple choice question, notice that there is a More Options... button that appears. Click on the More options... button to show the additional options you can enter for your multiple choice question.
Once you have clicked this button, you will see a textbox to enter a starting number for phone respondents to make their choice. In this case, let's enter "2" in the textbox since "2 adults" is the first choice.

To preview what your multiple choice question would look like to users who take your survey over the web, you can click the Preview button. For further reference on how to preview a page, please see here.
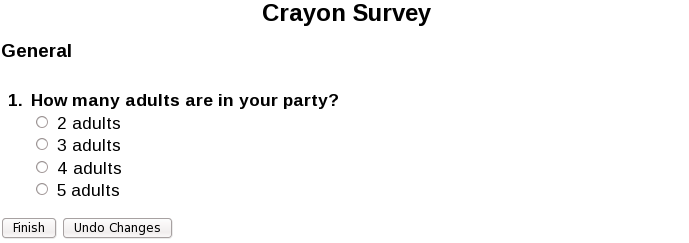
If you want to preview what your multiple choice question would sound like over the phone, you can click the Preview button and then click on the Phone tab. For further reference on how to preview a page, please see here.
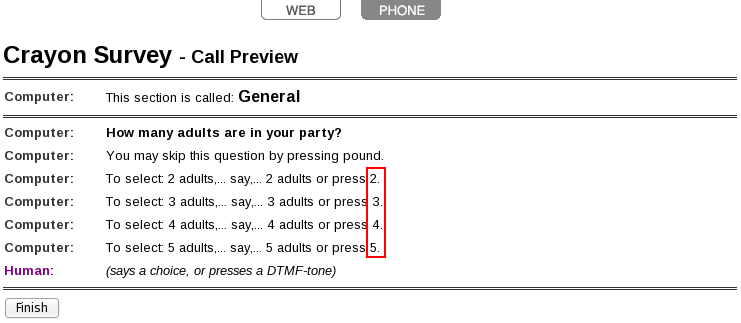
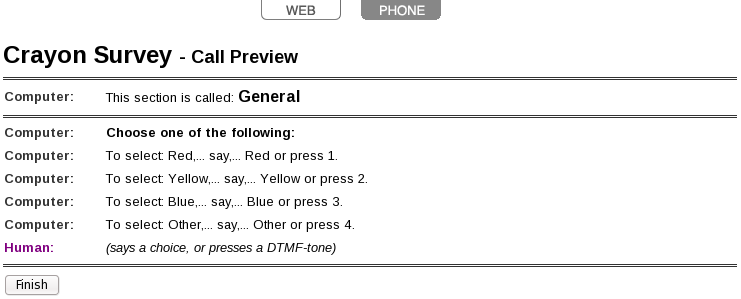
Notice that the survey phone choice now starts at "press 2" instead of "press 1".
NOTE: We have now added a new feature to set up DTMF utterances for a multiple choice question. To set up enable DTMF utterances, go to the Settings page of your survey and click on the radio button for "Enabled" to enable DTMF utterances.

Once you have enabled DTMF utterances, you can assign specific DTMF inputs (please note that acceptable DTMF assignments would include 0-9 and *) for the user to enter for your multiple choice question.

Here's a preview of how our survey question would sound if taken over the phone:
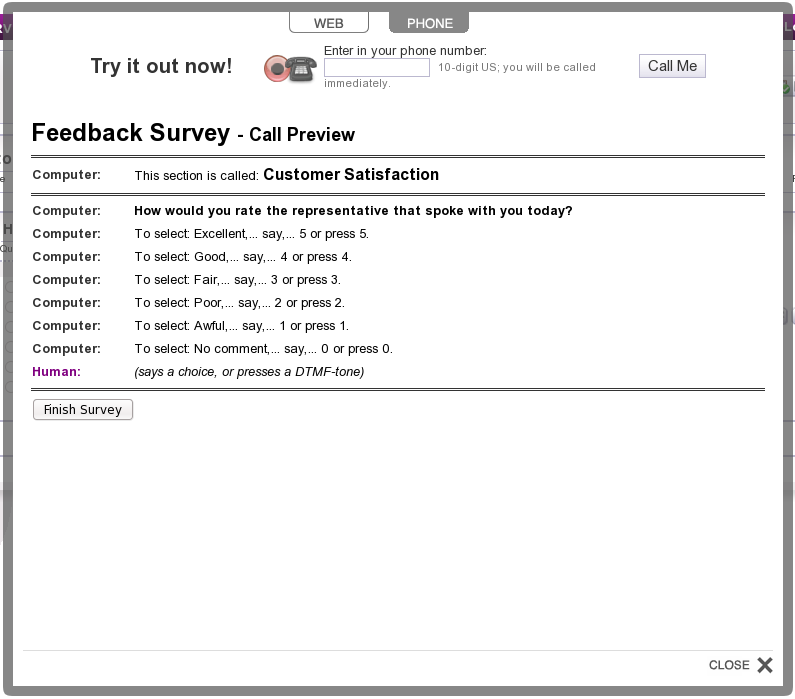
Please be mindful of when you enable both Speech Recognition and DTMF Utterance. For example, if you set "5" as the utterance for one of your choice texts, then the user can say or enter 5 to select this choice. It is considered bad practice to assign a non-DTMF value for utterance when you have both Speech Recognition and DTMF Utterance enabled. If a non-DTMF value is assigned for the utterance of one of your choice texts, the system will assign it with the DTMF value that would be assigned if DTMF utterance were disabled.
Multiselect questions allow the user to select multiple responses from the answer choices. To add this question type, select Multiselect from the drop-down box of question types and it will automatically be added.
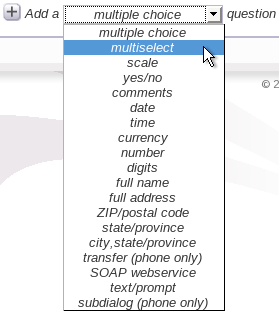
Once you have selected this question, the question will appear with the question text, "Choose any number of the following: (click to edit)". This question text should be changed as well to whatever you would like to input as the question text. Once you have written your question, click the Add Choice button to add choices for users to select for the question.

Once you have added a choice, you can input the text for the choice under Choice Text. You can also enter the result that gets returned to you under Data Value if a user selects a particular choice.
To preview what your multiselect question would look like to users who take your survey over the web, you can click the Preview button. For further reference on how to preview a page, please see here.
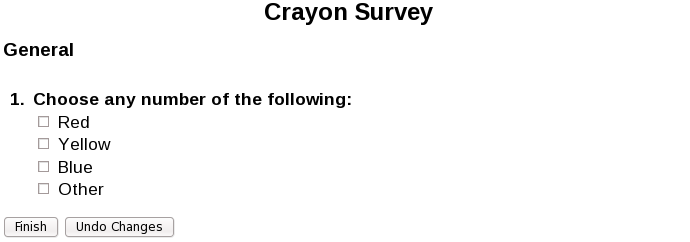
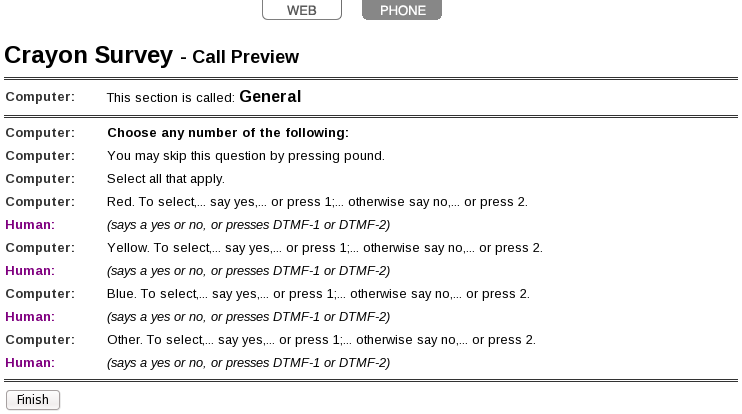
Please keep in mind that answering a multiselect question over the phone would differ from answering it on the web. For the web, you can select checkboxes to indicate which responses you want to choose. Over the phone, the multiselect question would be broken down into a set of yes/no questions as shown in the following example.
If you want to limit the amount of choices that a user can select for this question type, you can enable more options for your multiselect question to make this change. For information on how to set up more options, see below.
Once you have returned to your multiselect question, notice that there is a More Options... button that appears. Click on the More options... button to show the additional options you can enter for your multiselect question.

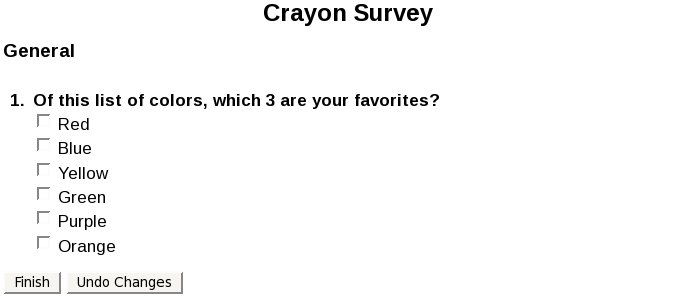
Once you have clicked this button, you will see a textbox to enter the maximum number of choices that the user is allowed to enter for your multiselect question. For this question, let's enter 3 as the maximum number of choices that the user can select.

To preview what your multiselect question would look like to users who take your survey over the web, you can click the Preview button. For further reference on how to preview a page, please see here.
If you want to preview what your multiselect question would sound like over the phone, you can click the Preview button and then click on the Phone tab. For further reference on how to preview a page, please see here.
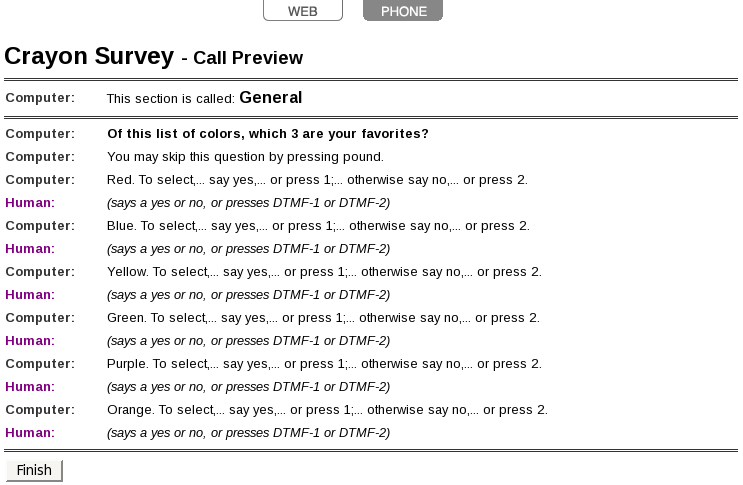
Please keep in mind that once the user has answered yes to 3 of these choices, the survey will go to the next question.
NOTE: If this question is marked as a Required question, then the respondent will see a "N/A" (Not Available) choice if they are taking a web survey (please also note that it is not possible to remove N/A as an option if this question is marked as Required). This gives the respondent the option of answering "Not Available" for your multiselect question (if they feel that none of the choices applies to them) since they are forced to answer your Required question. If you wish to remove the "N/A" choice, then you can uncheck the Required checkbox for you multiselect question.
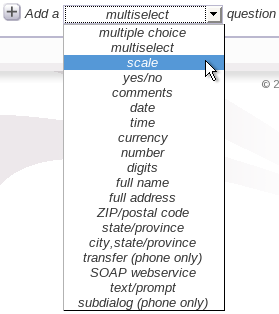
Scale questions are designed to give weighted values based on responses that are given from the user. For example, negative responses generally reflect low values while positive responses reflect high values. To add this question type, select Scale from the drop-down box of question types and it will automatically be added.
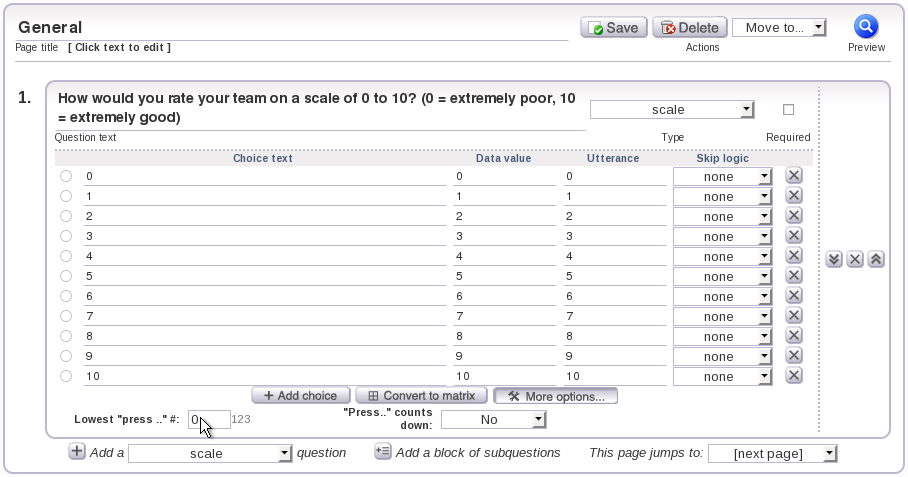
Once you have selected this question, the question will appear with the question text, "How would you rate it on a scale of 1 to 5? (click to edit)". You should edit this question text to however you like. Once you have written your question, you should notice that 5 choices are already set up for you to edit. You can edit these 5 choice texts to reflect the number values that were assigned to them, such as "Awful", "Poor", "Average", "Good", and "Excellent". You should also notice that the Data value and Utterance have already been filled with values 1-5. We recommend that you leave the Data value as is so that user responses have a weighted value attached to them for results purposes. You can change the values under Utterance to what you would like users to hear in the phone portion of your survey. You can also implement skip logic for your choices to skip to the appropriate page based on the user's response by selecting the page from the drop-down boxes under Skip logic.

If you wish to change the starting number that the phone respondent would press for the scale choice, you can enable more options for your scale question to make this change. For information on how to set up more options, see below.
Once you return to your scale question, notice that there is a More Options... button that appears. Click on the More options... button to show the additional options you can enter for your scale question.
Once you have clicked this button, you will see a textbox to enter a starting number for phone respondents to make their choice. In this case, let's enter "0" in the textbox since "0" is the low end of our scale question.
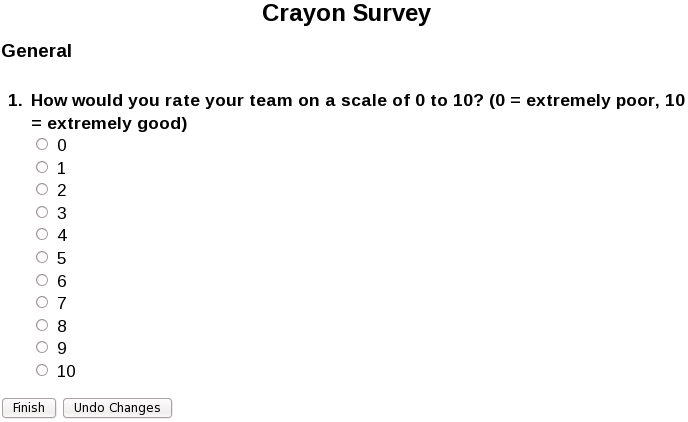
To preview what your scale question would look like to users who take your survey over the web, you can click the Preview button. For further reference on how to preview a page, please see here.
If you want to preview what your scale question would sound like over the phone, you can click the Preview button and then click on the Phone tab. For further reference on how to preview a page, please see here.
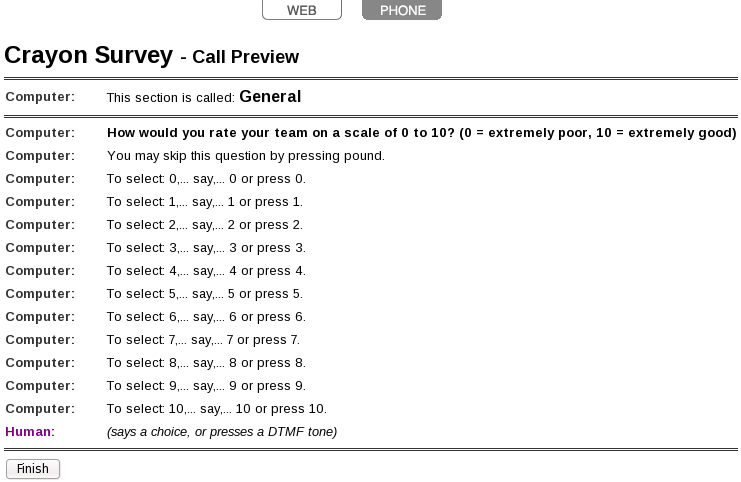
Notice that the survey phone choice now starts at "press 0" instead of "press 1".
NOTE: We have now added a new feature to set up DTMF utterances for a scale question. To set up enable DTMF utterances, go to the Settings page of your survey and click on the radio button for "Enabled" to enable DTMF utterances.

Once you have enabled DTMF utterances, you can assign specific DTMF inputs (please note that acceptable DTMF assignments would include 0-9 and *) for the user to enter for your scale question.

Here's a preview of how our survey question would sound if taken over the phone:
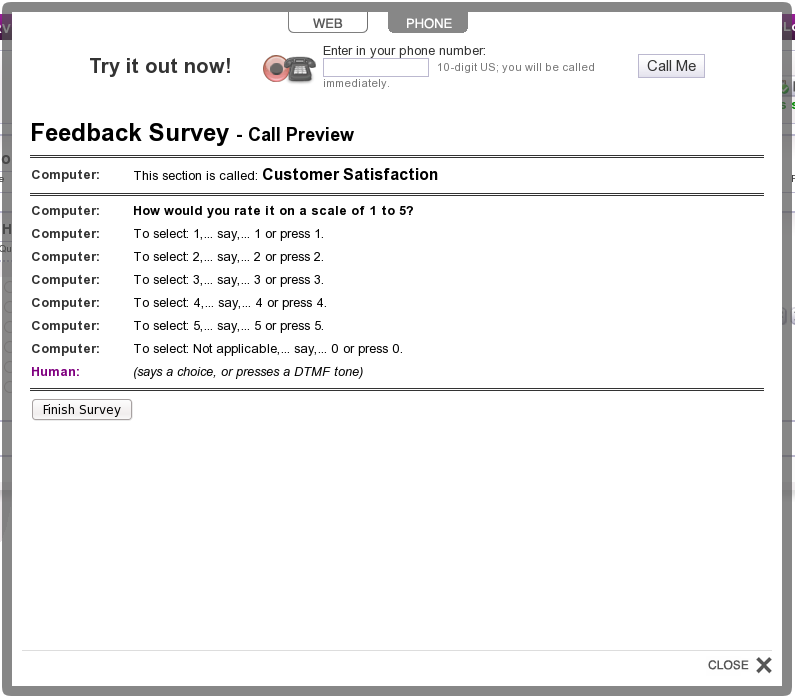
Please be mindful of when you enable both Speech Recognition and DTMF Utterance. For example, if you set "5" as the utterance for one of your choice texts, then the user can say or enter 5 to select this choice. It is considered bad practice to assign a non-DTMF value for utterance when you have both Speech Recognition and DTMF Utterance enabled. If a non-DTMF value is assigned for the utterance of one of your choice texts, the system will assign it with the DTMF value that would be assigned if DTMF utterance were disabled.
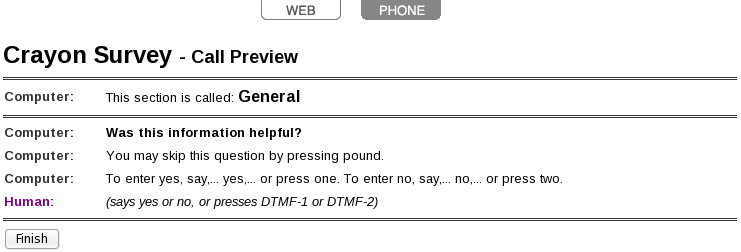
Yes/No questions allow the user to only answer with a Yes response or a No response. This type of question should be selected if you are sure that you only want a Yes or No response from the user. To add this question type, select Yes/No from the drop-down box of question types and it will automatically be added.
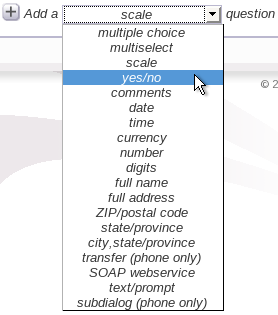
Once you have selected this question, the question will appear with the question text, "Was this information helpful? (click to edit)". You should edit this question text to whatever you would like for your question.
To preview what your yes/no question would look like to users who take your survey over the web, you can click the Preview button. For further reference on how to preview a page, please see here.

If you want to preview what your yes/no question would sound like over the phone, you can click the Preview button and then click on the Phone tab. For further reference on how to preview a page, please see here.
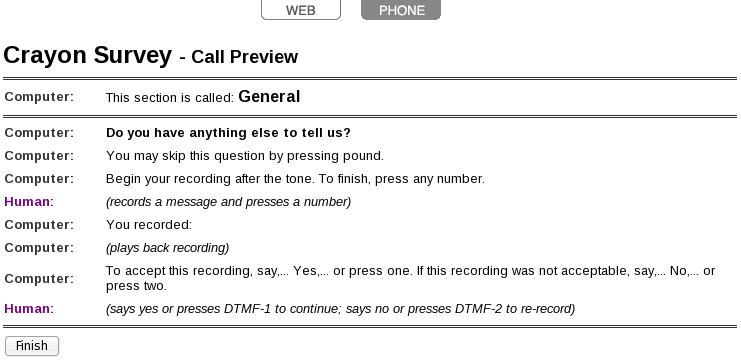
Comments questions allow for open-ended responses from users. You should select this type of question when you want users to input as much in their responses as they want. To add this question type, select Comments from the drop-down box of question types and it will automatically be added.
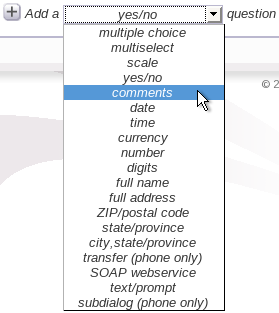
Once you have selected this question, the question will appear with the question text, "Do you have anything to tell us? (click to edit)". This question text should be edited to however you like.
If you wish to specify the maximum number of seconds a recording can last, you can enable more options for your comments question to make this change. For information on how to set up more options, see below.
Once you return to your comments question, notice that there is a More Options... button that appears. Click on the More options... button to show the additional options you can enter for your comments question.

Once you have clicked this button, you will see a textbox to enter the maximum number of seconds that a caller has to record their message (for phone surveys). Also, notice that there is another option where you can choose to allow for the caller to confirm their recorded message or not. If you desire for callers to confirm their recording, select Yes from the drop-down box for Confirm Recording:. If not, select No from the drop-down box for Confirm Recording:.
There is also now an option to transcribe recordings. When phone respondents record messages for your comments question, you will now be able to see these recordings in text when viewing responses. You would be able to see the transcribed recordings in Individual Responses, Summary Reports, and inside of a downloaded Excel/CSV spreadsheet.

To enable transcription, simply select Yes from the drop-down box for Transcribe Recordings:.

To preview what your comments question would look like to users who take your survey over the web, you can click the Preview button. For further reference on how to preview a page, please see here.

If you want to preview what your comments question would sound like over the phone, you can click the Preview button and then click on the Phone tab. For further reference on how to preview a page, please see here.
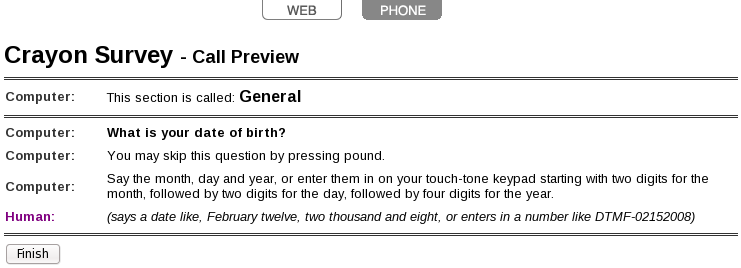
Date questions are designed to extract date information from users. A good example of when to use this question is when you want to collect the user's date of birth. To add this question type, select Date from the drop-down box of question types and it will automatically be added.
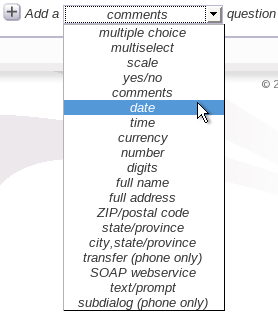
Once you have selected this question, the question will appear with the question text, "What is your date of birth? (click to edit)". This question text should be edited to however you like.
To preview what your date question would look like to users who take your survey over the web, you can click the Preview button. For further reference on how to preview a page, please see here.

If you want to preview what your date question would sound like over the phone, you can click the Preview button and then click on the Phone tab. For further reference on how to preview a page, please see here.
Time questions are designed to allow the user to enter a time in the correct format. For example, you could use this question type when you want to collect a response from the user of when they do a daily activity. To add this question type, select Time from the drop-down box of question types and it will automatically be added.
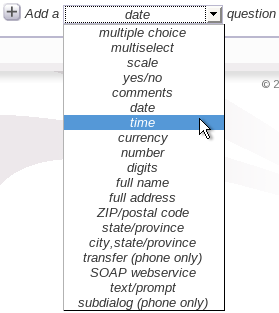
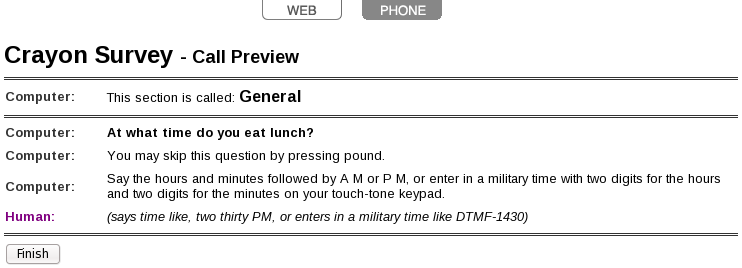
Once you have selected this question, the question will appear with the question text, "At what time do you eat lunch? (click to edit)". This question text should be edited to however you like.
To preview what your time question would look like to users who take your survey over the web, you can click the Preview button. For further reference on how to preview a page, please see here.

If you want to preview what your time question would sound like over the phone, you can click the Preview button and then click on the Phone tab. For further reference on how to preview a page, please see here.
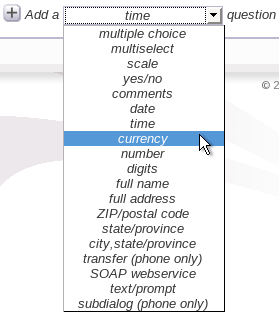
Currency questions allow the user to input a currency response in its correct format. A good example for this question type would be if you wanted to collect information on the amount of cash that users spend on weekly groceries. To add this question type, select Currency from the drop-down box of question types and it will automatically be added.
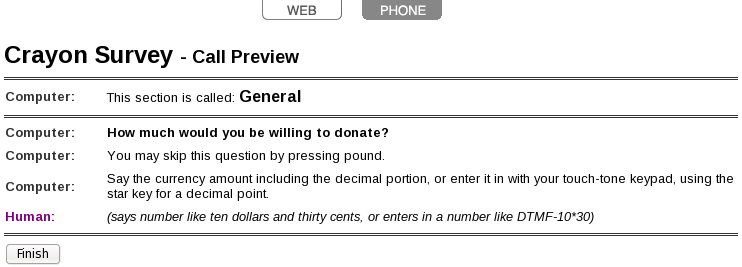
Once you have selected this question, the question will appear with the question text, "How much would you be willing to donate? (click to edit)". This question text should be edited to however you like.
To preview what your currency question would look like to users who take your survey over the web, you can click the Preview button. For further reference on how to preview a page, please see here.

If you want to preview what your currency question would sound like over the phone, you can click the Preview button and then click on the Phone tab. For further reference on how to preview a page, please see here.
Number questions allow the user to enter numerical responses with a decimal format. Number questions should be used when you expect a number that can include a decimal point. An example of how to use this question type would be if you wanted to collect the daily calorie intake of your users. To add this question type, select Number from the drop-down box of question types and it will automatically be added.
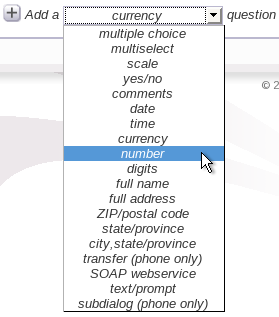
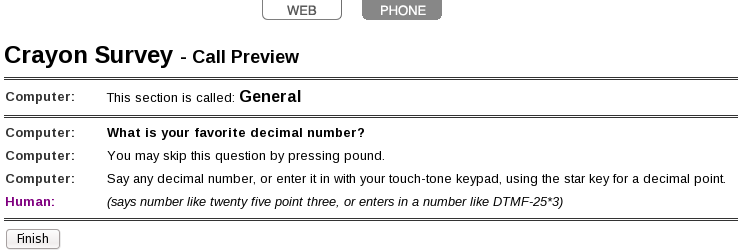
Once you have selected this question, the question will appear with the question text, "What is your favorite decimal number? (click to edit)". This question text should be edited to however you like.
To preview what your number question would look like to users who take your survey over the web, you can click the Preview button. For further reference on how to preview a page, please see here.

If you want to preview what your number question would sound like over the phone, you can click the Preview button and then click on the Phone tab. For further reference on how to preview a page, please see here.
Digits questions are designed for when you want a whole number response from the user. Digits questions only accept integers as responses. So, if you want a response to return a number that includes a decimal in it, use the Number question instead. For example, if you wanted to collect the number of family members living in a certain address from users, then you would want to use a Digits question. To add this question type, select Digits from the drop-down box of question types and it will automatically be added.
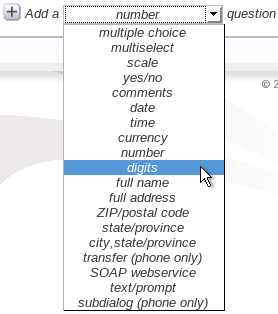
Once you have selected this question, the question will appear with the question text, "What is your favorite integer? (click to edit)". This question text should be edited to however you like.
To limit the number of digits that can be entered by the respondent, you can set a minimum and maximum length of digits to be accepted by the survey. To do this, you must first set up more options for your question. For information on how to set up more options, see below.
Once you return to your digits question, notice that there is a More Options... button that appears. Click on the More options... button to show the additional options you can enter for your digits question.
Once you have clicked this button, you will see two textboxes to enter a "Minimum length:" and "Maximum length:".
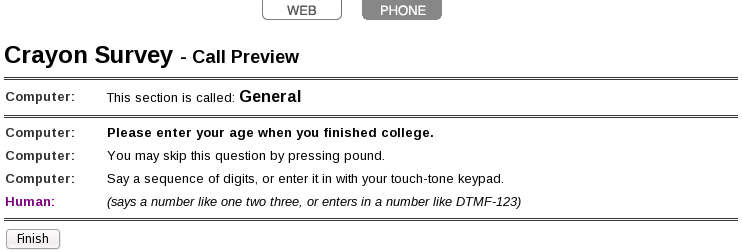
For our digits question, "Please enter your age.", enter "2" for "Minimum length:" and "3" for "Maximum length:".
This means that the survey will check to see if the number of digits entered by the respondent is between 2 and 3.
To preview what your digits question would look like to users who take your survey over the web, you can click the Preview button. For further reference on how to preview a page, please see here.

Note that if you enter "1" in the textbox and try to click on the Finish button, you would see the following message:

The reason why you see this message is because the number of digits entered is not between 2 and 3.
To get rid of these errors, the respondent would have to enter 2 to 3 digits before the survey accepts the response.

If you want to preview what your digits question would sound like over the phone, you can click the Preview button and then click on the Phone tab. For further reference on how to preview a page, please see here.
Full Name questions allow users to enter their first name and last name. To add this question type, select Full Name from the drop-down box of question types and it will automatically be added.
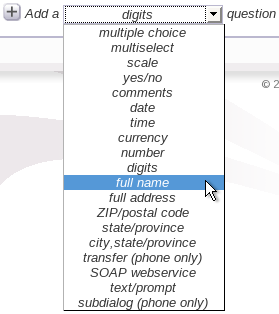
Once you have selected this question, the question will appear with the question text, "What is your full name? (click to edit)". This question text should be edited to however you like.
To preview what your full name question would look like to users who take your survey over the web, you can click the Preview button. For further reference on how to preview a page, please see here.

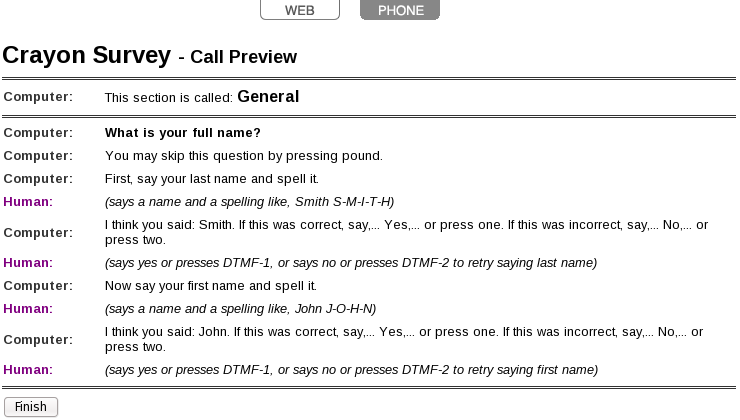
If you want to preview what your full name question would sound like over the phone, you can click the Preview button and then click on the Phone tab. For further reference on how to preview a page, please see here.
Full Address questions allow users to enter their street address, their city, their state, and their zip code. To add this question type, select Full Address from the drop-down box of question types and it will automatically be added.
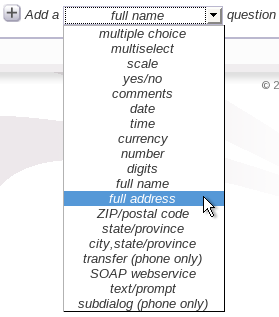
Once you have selected this question, the question will appear with the question text, "What is your full address? (click to edit)". This question text should be edited to however you like.
To preview what your full address question would look like to users who take your survey over the web, you can click the Preview button. For further reference on how to preview a page, please see here.

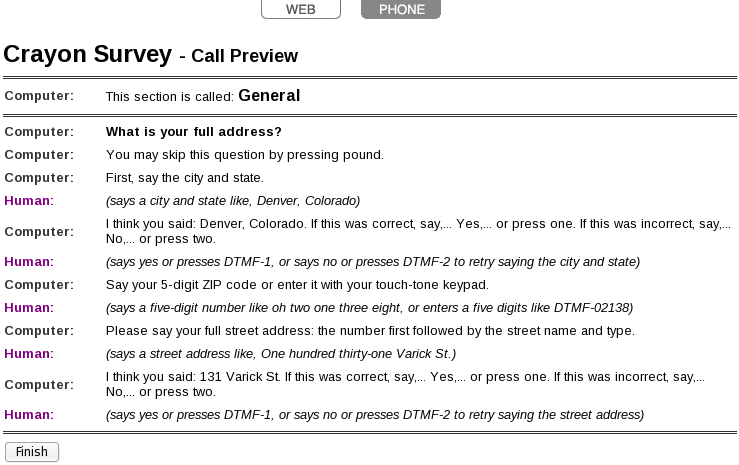
If you want to preview what your full address question would sound like over the phone, you can click the Preview button and then click on the Phone tab. For further reference on how to preview a page, please see here.
Zip/Postal Code questions allow users to just enter their zip code or postal code. To add this question type, select ZIP/Postal Code from the drop-down box of question types and it will automatically be added.
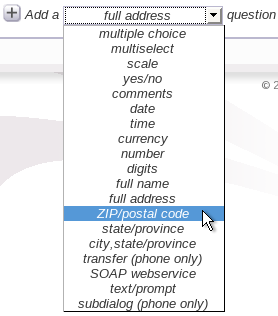
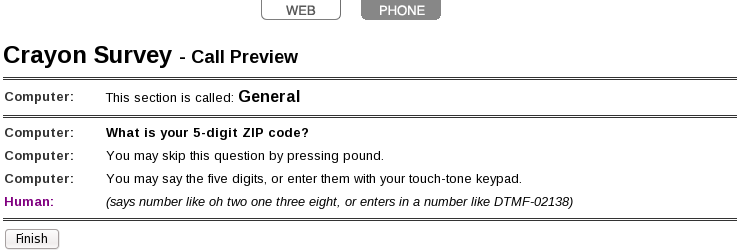
Once you have selected this question, the question will appear with the question text, "What is your 5-digit ZIP code? (click to edit)". This question text should be edited to however you like.
To preview what your zip/postal code question would look like to users who take your survey over the web, you can click the Preview button. For further reference on how to preview a page, please see here.

If you want to preview what your zip/postal code question would sound like over the phone, you can click the Preview button and then click on the Phone tab. For further reference on how to preview a page, please see here.
State/Province questions allow users to just enter their state or province. To add this question type, select State/Province from the drop-down box of question types and it will automatically be added.
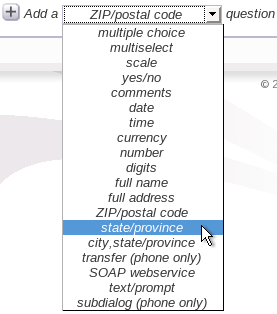
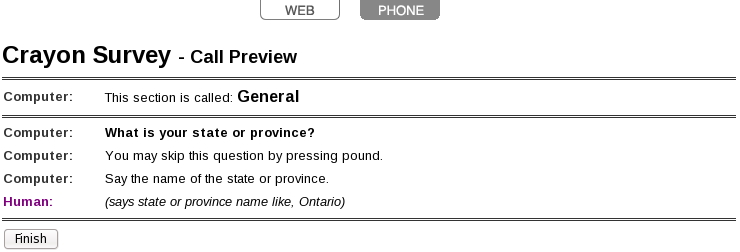
Once you have selected this question, the question will appear with the question text, "What is your state or province? (click to edit)". This question text should be edited to however you like.
To preview what your state/province question would look like to users who take your survey over the web, you can click the Preview button. For further reference on how to preview a page, please see here.

If you want to preview what your state/province question would sound like over the phone, you can click the Preview button and then click on the Phone tab. For further reference on how to preview a page, please see here.
City,State/Province questions allow users to just enter their city and state or city and province. To add this question type, select City,State/Province from the drop-down box of question types and it will automatically be added.
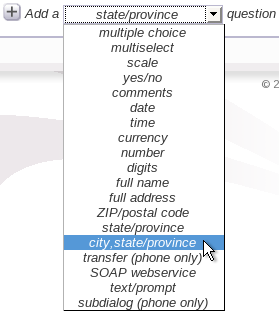
Once you have selected this question, the question will appear with the question text, "What is your city and state? (click to edit)". This question text should be edited to however you like.
To preview what your city,state/province question would look like to users who take your survey over the web, you can click the Preview button. For further reference on how to preview a page, please see here.

If you want to preview what your city,state/province question would sound like over the phone, you can click the Preview button and then click on the Phone tab. For further reference on how to preview a page, please see here.
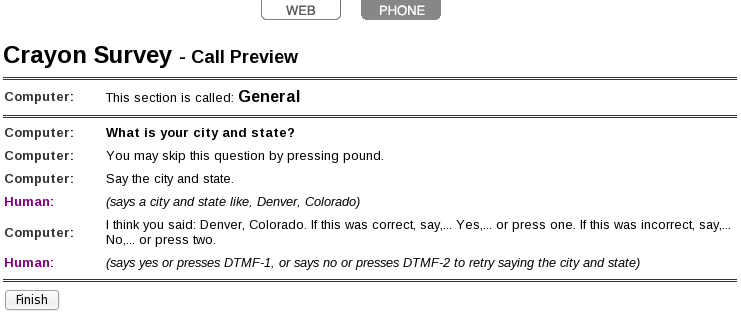
For question types, Full Name, Full Address, ZIP/Postal Code, State/Province, and City,State/Province, you would want to use these types of questions if you wanted to collect demographic information from the user.
Transfer questions allow users to be transferred to another phone number. You can use this question type to create an autoattendant where users get transferred to a specific phone number based on the choice that they make. Please keep in mind that this can only be used for surveys taken over the phone and that 800 numbers CANNOT transfer to other 800 numbers. To add this question type, select Transfer (phone only) from the drop-down box of question types and it will automatically be added.
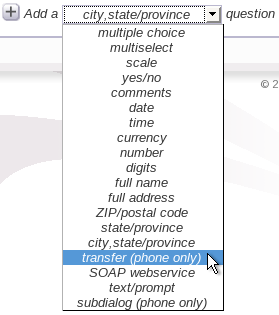
Once you have selected this question, the question will appear with the question text, "617-712-3000 (click to edit)". This question text should be edited to the number that you want your users to be transferred to.
If you want to preview what your transfer question would sound like over the phone, you can click the Preview button and then click on the Phone tab. For further reference on how to preview a page, please see here.

NOTE: For transfer type questions, the answer given for the individual response is the number of minutes that the transfer lasted.
SOAP Webservice questions can be used to send responses straight to your database or perform logic on provided responses during the course of the survey. You must provide a WSDL for your SOAP service that specifies only one function named "plumEval". This function will receive two arrays of strings: one with the text of each question on the current page, and the other with all the answers received on the current page. These arrays will be indexed in the same fashion, where each array's elements will be ordered so that the questions correspond with the answers. This function should return a string, which will be saved as the response for the question calling this webservice. A cookie containing the ANI or IP address of the current respondent will also be sent in the HTTP headers of the request, called ani or ip, respectively.
To ensure compatibility with the survey tool, your webservice function signature should read as follows:
plumEval($question_texts, $answers)
You are able to add choices to SOAP Webservice questions and add skip logic for each choice. Responses from the SOAP webservice will not be constrained to the data values for your choices. However, if there is a choice with a data value that corresponds to the SOAP webservice's reply, its skip logic (if any) will be followed.
The sample webservice (WSDL, source code) we provide returns "accepted" if any of the submitted answers have a "yes" response, and returns "rejected" if otherwise. To demonstrate that our webservice client can accept, store, and send cookies, it will return "accepted again" for subsequent requests that would have returned "accepted". To add this question type, select SOAP webservice from the drop-down box of question types and it will automatically be added.
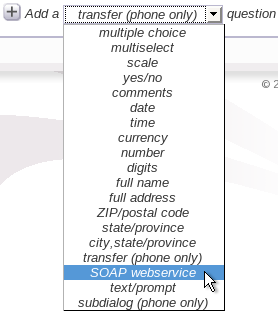
Once you have selected this question, it will appear with the URL of our sample webservice, http://survey.plumvoice.com/ws/sample-webservice.php?wsdl. You can change this text to your WSDL's URL.
Additionally, you can add skip logic to your webservice question. Under the Skip logic header, you can select the page that gets skipped to based on what the webservice returns. From our sample webservice, since we know that it only returns "accepted" or "rejected" as a string, we can set up our skip logic in the following way:

From this example, if the user responds with a "yes" to question 1, the webservice question would return an "accepted" response and direct the user to page 2. If the user responds with a "no", the webservice question would return a "rejected" response and direct the user to page 3.
For more information on skip logic in general, see Section 6. Webservices also have advanced options that can be used to skip to specific questions within pages (for phone surveys only). This is described in Section 6.4 of the tutorial.
If a WSDL cannot be found at the URL you provide, you will be informed as soon as you save the page. If an error occurs while processing a SOAP request to one of your webservices, you will be e-mailed the contents of the SOAP fault, if your e-mail address is available. Please note that these SOAP faults contain error messages generated by your webservice and are specific to your SOAP implementation. For more information, you should consult your webservice's logs or debug it locally.
Webservice calls are always made at the end of a page, so the position of the SOAP webservice question within a page only matters for purposes of reporting, and they always receive all the responses provided to questions on the entire page. If you have selected to save responses on premature hangup under Phone Options, the webservice request will still be made if the user hangs up before reaching the end of the page.
For a link to the sample webservice source code, see here.
NOTE: We now have a validation tool for you to check your web service against. For a link to this SOAP web service tester, see here.
Subdialog questions can be used to perform logic on provided responses during the course of a phone survey as well as run custom VoiceXML code directly within your survey. The custom VoiceXML could provide prompts or dialog that goes beyond the scope of our question types, for instance, giving the user audible feedback on the responses they have entered. You must provide a URL for your subdialog that will provide valid VoiceXML in response to an HTTP POST.
Knowledge of VoiceXML is required to utilize the subdialog type. The Plum Survey phone component runs on a Plum-hosted VoiceXML platform. For a full reference of VoiceXML as related to Plum Voice's platform, as well as a tutorial to get you started in coding in VoiceXML, please see our Plum d.e.v. documentation.
All answers received so far on the current page, along with their corresponding question texts, are POST'ed to the subdialog URL along with the ANI (caller ID) of the respondent. The variables are in the format of answers_0, answers_1, answers_2 ... and question_texts_0, question_texts_1, question_texts_2..., and finally ani. The encoding type for the POST request will be multipart/form-data, because some of the answers may consist of recorded audio files with a Internet media type of audio/basic; these are 8 kHz, 8-bit mu-law-encoded headerless WAV files that the web server hosting your subdialog may choose to save and process.
The subdialog you provide should return one variable called result, which will be stored as a string value for the question's answer.
You are able to add choices to subdialog questions and add skip logic for each choice. The result for the subdialog will not be constrained to the data values for your choices. However, if there is a choice with a data value that corresponds to the returned result, its skip logic (if any) will be followed.
For more information on skip logic in general, see Section 6. Subdialogs also have advanced options that can be used to skip to specific questions within pages. This is described in Section 6.4 of the tutorial.
To add this question type, select subdialog (phone only) from the drop-down box of question types and it will automatically be added.
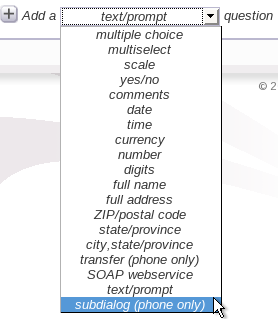
Once you have selected this question, it will appear with the URL of our sample subdialog, http://survey.plumvoice.com/ws/sample-subdialog.php. You can change this text to the URL of your subdialog.
If an error occurs with your subdialog, you will be e-mailed about the error, if your e-mail address is available. Please note that if we are unable to fetch your VoiceXML or if it does not validate, your subdialog will not execute and you will have to test fetching it yourself to debug the problem. For more information, you should consult our Plum d.e.v. documentation or seek assistance from our forum.
For a link to the sample subdialog source code, see here.
Text prompts can be inserted in your survey where you want to read a prompt to your respondent, without them having to answer anything. To insert a text prompt between questions, you can select text/prompt from the drop-down box of question types and it will automatically be added.
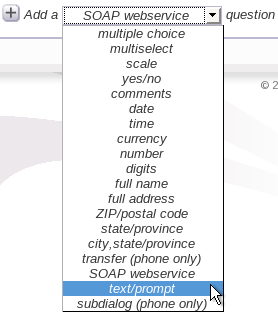
Once you have added this text prompt question type into your survey, it will appear with the text, "This is some descriptive text that can be shown or spoken between questions, to provide directions or background information." This text should be edited to however you like.
To preview what your text prompt would look like to users who take your survey over the web, you can click the Preview button. For further reference on how to preview a page, please see here.

If you want to preview what your text prompt would sound like over the phone, you can click the Preview button and then click on the Phone tab. For further reference on how to preview a page, please see here.

To set up more options for your question, first place your mouse over the "Help" header and click on My Account.
Once there, for Per-Question Options, click on the radio button for Show advanced question options.
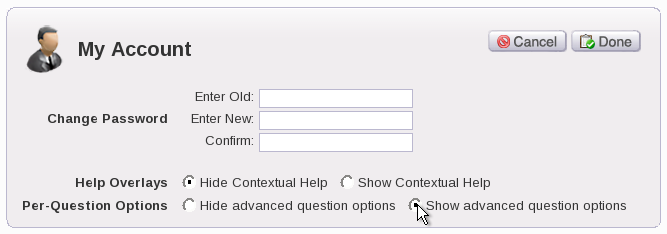
Click the Done button to save your changes and then place your mouse on the "Surveys" header and click on My Surveys to go back to your surveys. Click on the Edit tab and then click on Edit Content to go back to your survey.
By default, survey questions are checked off as required in the checkbox located to the right of the question type drop-down box for the question. Making a question required will force the user to input a response for the question and not allow the user to skip it.

On the web, users will see asterisks for required questions. If a user attempts to skip a required question, the question would generate error messages, forcing the user to answer that question.
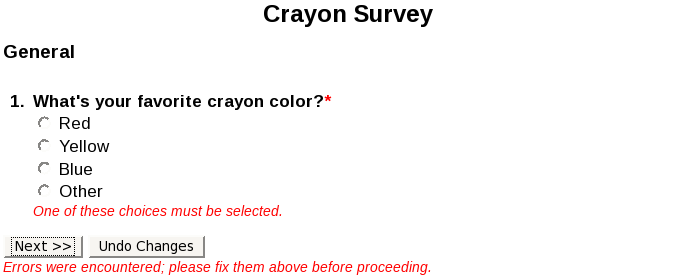
Over the phone, users will not hear the prompt, "You may skip this question by pressing pound." If they attempt to enter pound to skip the question, it will be treated as a nomatch and reprompt the question to the user.
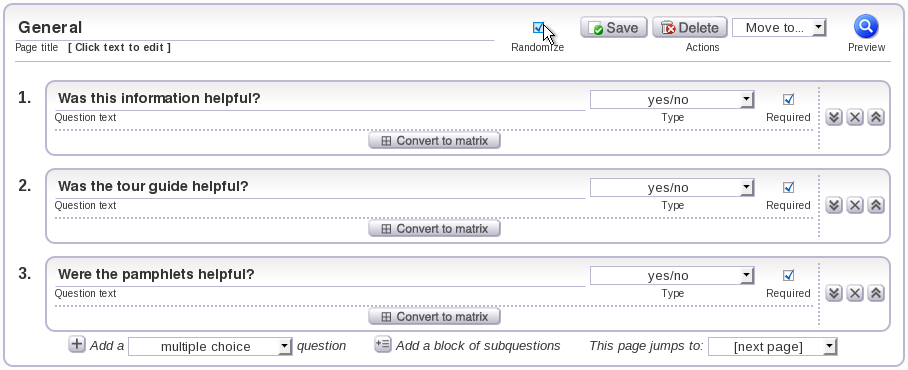
To set up randomization on a page for your survey questions, click on the checkbox located to the right of the page title.
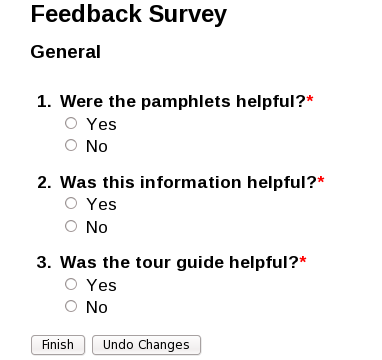
By clicking on the "Randomize" checkbox, your questions will be randomly ordered for when your respondents take your survey. For example, notice how our questions have been randomly ordered for our web survey:
NOTE: When using the randomization feature, please keep in mind that if you are using a text prompt to provide more background information for any of the questions on that page, it might not come up in the location where you originally placed it since it too, is randomized.
When you have finished adding all of your questions to your page, you should save your page by clicking the Save button located to the right of the Page title. Once you click the Save button, you should see a notification that tells you, "Changes saved."
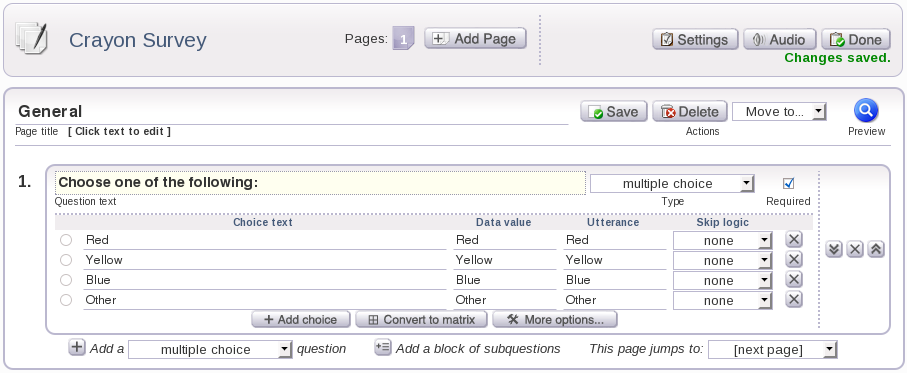
When you are finished saving your page, you can begin adding new pages onto your survey.
Enabling bargein for your survey questions allows the user to barge in on a question when taking a phone survey (e.g. say or enter an input before the question has finished). Please note that this feature is only available for the following question types: Multiple Choice, Multiselect, Scale, Yes/No, Comments, Date, Time, Currency, Number, Digits, Full Name, Full Address, Zip/Postal Code, State/Province, City,State/Province. You can also enable this feature for text/prompts.
To enable bargein for your survey questions, first place your mouse over the "Help" header and click on My Account.
Once there, for Per-Question Options, click on the radio button for Show advanced question options.

Click the Done button to save your changes and then place your mouse on the "Surveys" header and click on My Surveys to go back to your surveys. Click on the Edit tab and then click on Edit Content to go back to your survey.
In your survey, to enable bargein for your question, click on the drop-down menu for "Allow bargein:" and select Yes.

To randomize answers for a multiple choice question, first place your mouse over the "Help" header and click on My Account.
Once there, for Per-Question Options, click on the radio button for Show advanced question options.

Click the Done button to save your changes and then place your mouse on the "Surveys" header and click on My Surveys to go back to your surveys. Click on the Edit tab and then click on Edit Content to go back to your survey.
In your survey, to enable the randomization of answers for your multiple choice question, click on the drop-down menu for "Randomize answers:" and select Yes.

By enabling this option, you'll find that the answer choices for your multiple choice questions will be randomized.
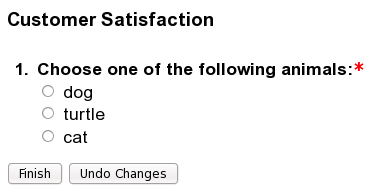
Enabling the verification of answers for your survey allows users to confirm their responses for phone surveys. Please note that this feature is only available for the following question types: Multiple Choice, Multiselect, Scale, Yes/No, Date, Time, Currency, Number, Digits, Zip/Postal Code, and State/Province.
To verify answers for your survey questions, first place your mouse over the "Help" header and click on My Account.
Once there, for Per-Question Options, click on the radio button for Show advanced question options.

Click the Done button to save your changes and then place your mouse on the "Surveys" header and click on My Surveys to go back to your surveys. Click on the Edit tab and then click on Edit Content to go back to your survey.
In your survey, to enable the verification of answers for your survey questions, click on the drop-down menu for "Verify answer:" and select Yes.

1. Creating a Survey  Prev Prev |
Next  3. Adding Grouped and Matrix Questions 3. Adding Grouped and Matrix Questions |