© 2013 Plum Group, Inc. All rights reserved.
| 2. Adding Questions |
Next |
To add a group of questions, click the button next to "Add a block of subquestions". This button has a plus button icon on it with 3 horizontal lines to the right of it. If you have the "Show Help Overlays" checkbox selected, notice that when you place your mouse over this button, the words, "Add a block of subquestions to this page" should appear.

Once you click this button, the words, "Section heading (click to edit)", will appear for the Section heading. The following example demonstrates a group of questions that you would want to place together in a section for your survey.

For our example, let's name the Section heading, "Demographics". For the first question of our section, let's select Full Name from the drop-down box for the question type. For the next question of our section, let's select City,State/Province from the drop-down box for the question type. For the last question of our section, let's select ZIP/Postal Code from the drop-down box for the question type. Notice that each time you add a subquestion to your grouped question, it is marked by a letter of the alphabet to the left of the "Subquestion text".
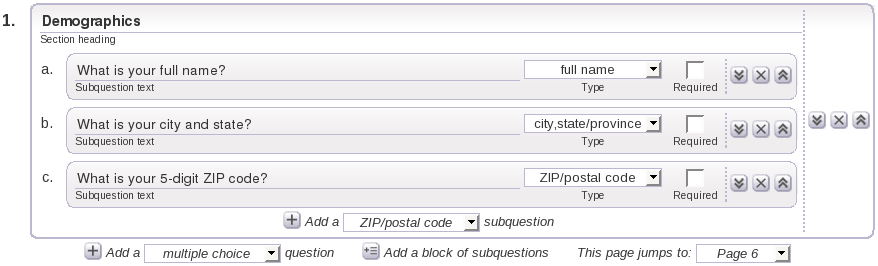
Note that once we have added all the questions to our section, we can still edit them to however we like. To make a question required, simply click the checkbox above Required for the corresponding question. For more editing changes that you can make to your questions, see Section 5 on "Editing Questions and Pages".
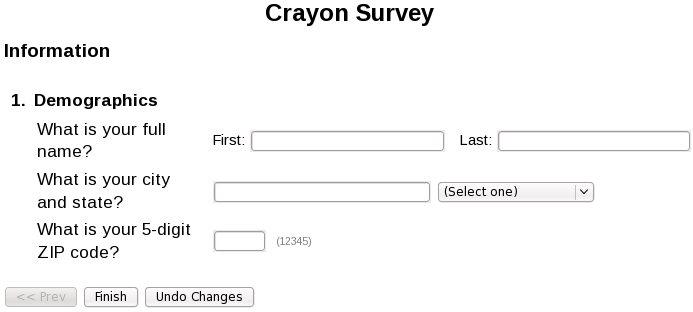
To preview what your grouped question would look like to users who take your survey over the web, you can click the Preview button.
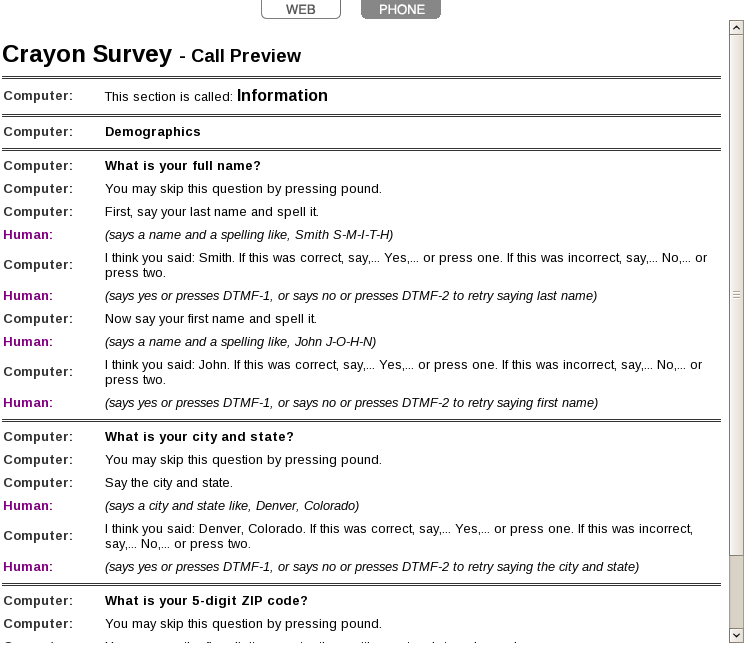
If you want to preview what your grouped question would sound like over the phone, you can click the Preview button and then click on the Phone tab.
You can also group your questions to appear like a matrix. This option only applies to question types: Multiple Choice, Multiselect, Scale, and Yes/No.
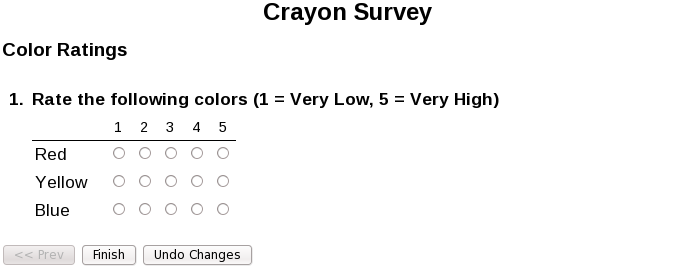
For the next example, let's create a matrix of scale questions. To begin, click the button next to "Add a group of questions". For the Section heading, let's name it "Rate the following colors (1 = Very Low, 5 = Very High):". Next, select Scale from the drop-down box of subquestions and the survey editor will automatically add the question for you. Keep in mind that for Multiple Choice questions, you would have to click the "Plus" button to add the question. Selecting it from the drop-down box would not automatically add the question to the page. From here, click on the Convert to matrix button located to the right of the Add choice button. When you click the button, your question will change to a matrix format.
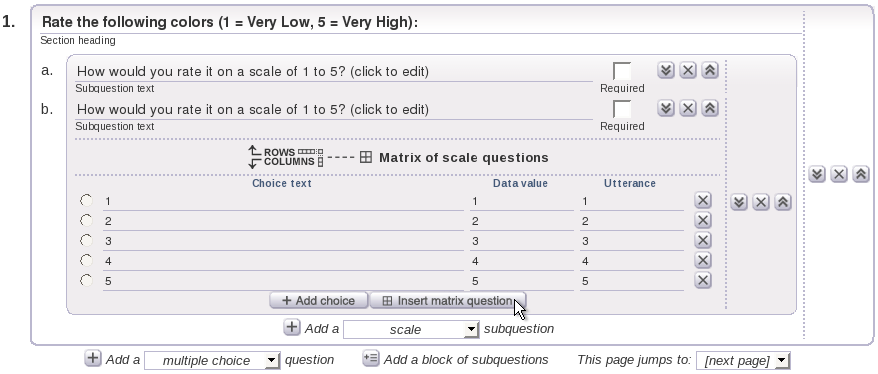
While you are in matrix format, you can click the Insert matrix question button located to the right of the Add choice button to add rows to your matrix. Notice that each time you add a row to your matrix, it is marked by a letter of the alphabet to the left of the "Subquestion text". You can edit your questions for your rows by inputting the question text that you desire for each of the rows. For our example, let's make the "Subquestion text" for row 1 "Blue", the "Subquestion text" for row 2 "Red", and the "Subquestion text" for row 3 "Yellow".
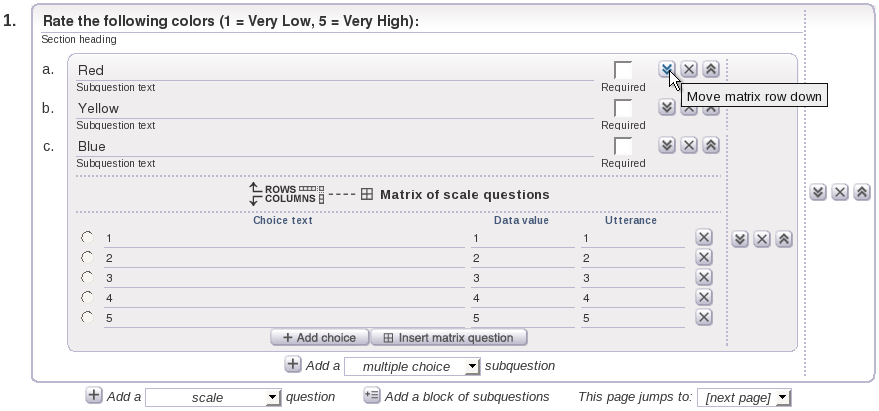
Once you have added all your rows, you can edit them however you like. To make a row question required, you can click the Required checkbox for the corresponding question. You can also move your row questions by using the up and down buttons. To move a row question down, place your mouse over the down button located to the left of the X button. If you have the "Show Help Overlays" checkbox selected, the words, "Move matrix row down", should appear. Once you click this button, you should notice that your question will shift below the question that followed it.
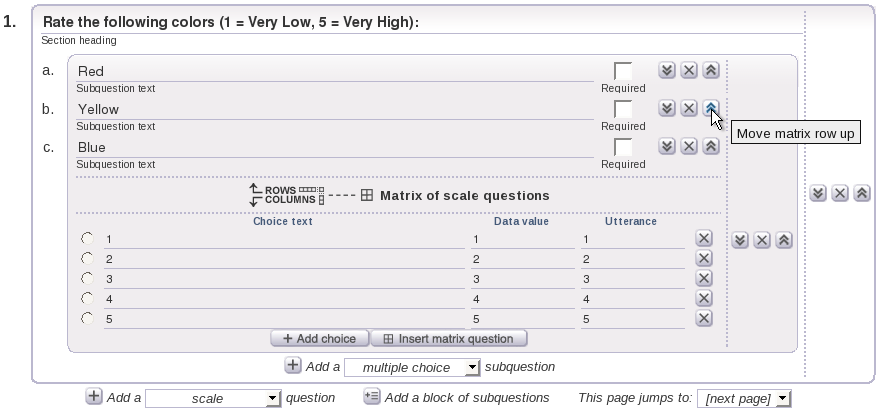
To move a row question up, place your mouse over the up button located to the right of the X button. If you have the "Show Help Overlays" checkbox selected, the words, "Move matrix row up", should appear. Once you click this button, you should notice that your question will shift above the question previous to it.
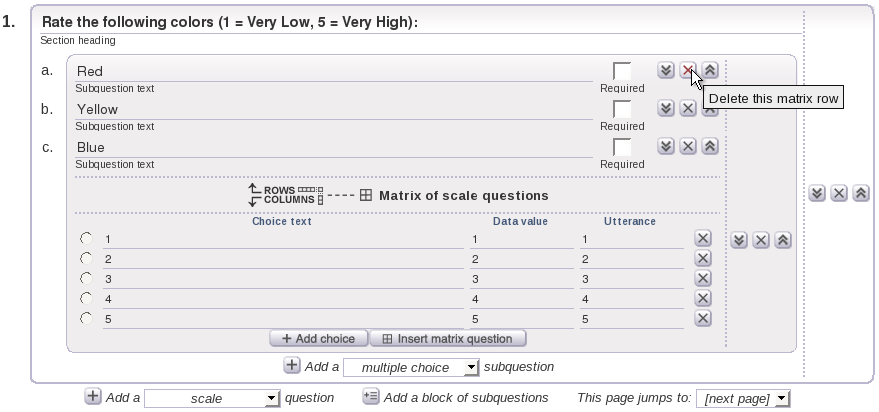
To delete a row question, place your mouse over the X button located in between the up and down buttons. If you have the "Show Help Overlays" checkbox selected, the words, "Delete this matrix row", should appear. Once you click this button, your matrix row will be deleted.
To add a column to your matrix, click the Add choice button. Notice that the same properties apply to these questions, where you can enter the Choice text, Data value, and Utterance. To delete a choice, you can still click the X button corresponding to the choice you want to delete. The only exception is that Skip logic is not a feature, and thus, it is not available for questions. For this example, let's just keep all the default values for our Scale choices.
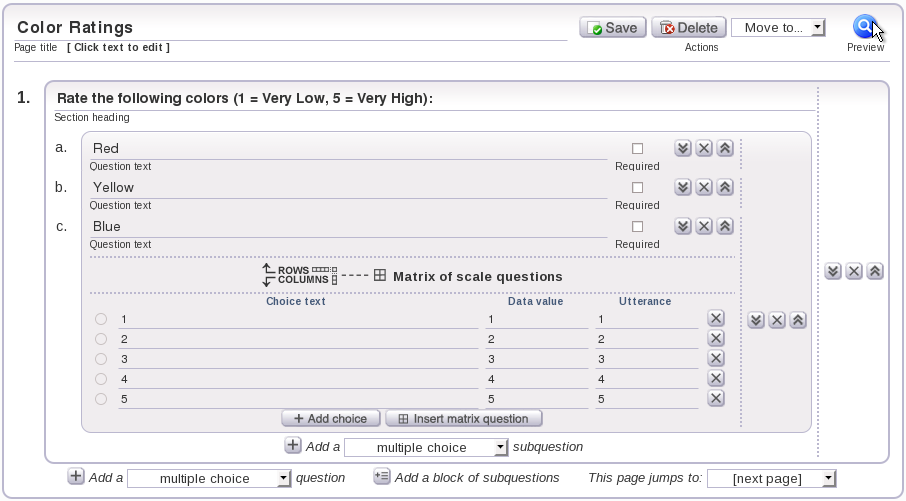
When you are finished completing your matrix, you can click the Preview button to preview your matrix question for your survey page.
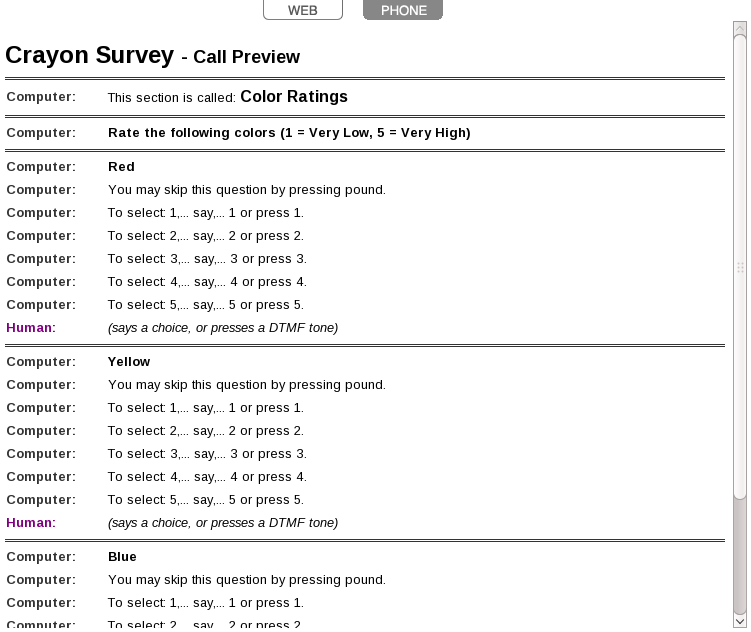
If you want to preview what your matrixed question would sound like over the phone, you can click the Preview button and then click on the Phone tab.
| 2. Adding Questions |
Next |