© 2013 Plum Group, Inc. All rights reserved.
| 7. Saving and Exiting Pages |
Next |
To edit the survey settings of your survey, click on the Settings button next to the Done button at the top right-hand corner of the Edit Content page of your survey or click on Survey Settings on My Surveys page under the "Edit" Tab.
On this page, you can adjust the global settings for your survey. If you wanted to change the title of the survey, you can edit the text for Change Name. You can also change the End Date, which is when data collection will end for the survey. You can edit the maximum amount of responses that you receive for your survey by entering a number in the Max Responses textbox.
To disable saving of identifying information such as ANI or IP address, select the Discard option under Identifying Info. If you are storing identifying information, you can attempt to enforce that each respondent has a unique ANI or IP address. Choosing Enforced for Unique Respondents ensures that only one response is allowed per IP address or phone number. However, this may prevent people who access the internet from behind the same router, or share a phone or computer, from being able to access your survey.

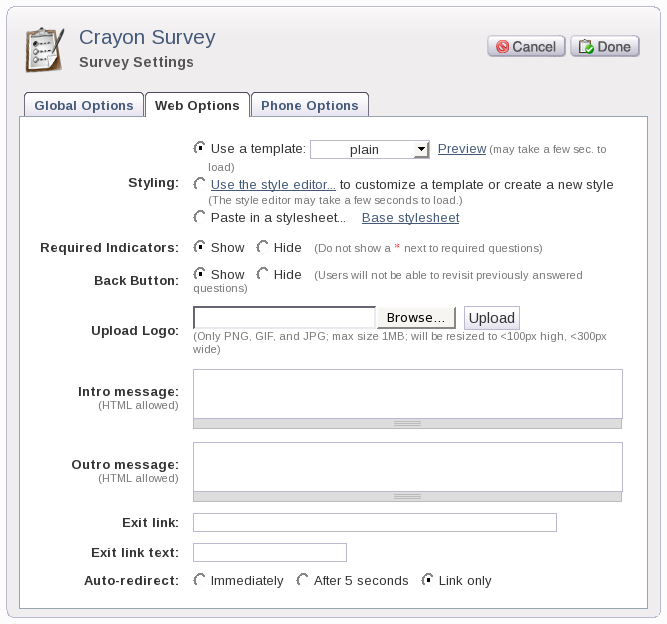
For the web portion of the survey alone, you can change the style of the survey by selecting one of three choices from Styling. If you choose Use a template, you can select a pre-made style template from the drop-down box. You can select from: plain, modern maroon, cherry cola, blue ocean, plum purple, spring fields, treasure island, corporate, sunshine, watermelon, crayon, morning breakfast, coffee in bed, marmalade, influence, letterhead, and mars.
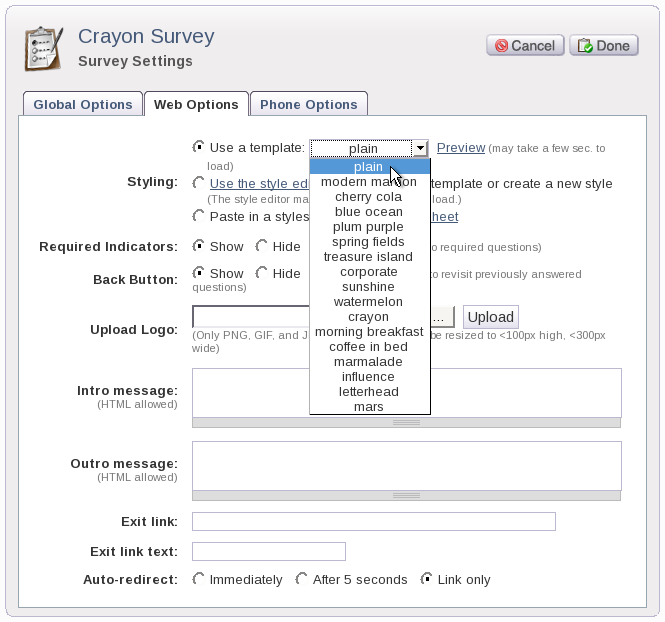
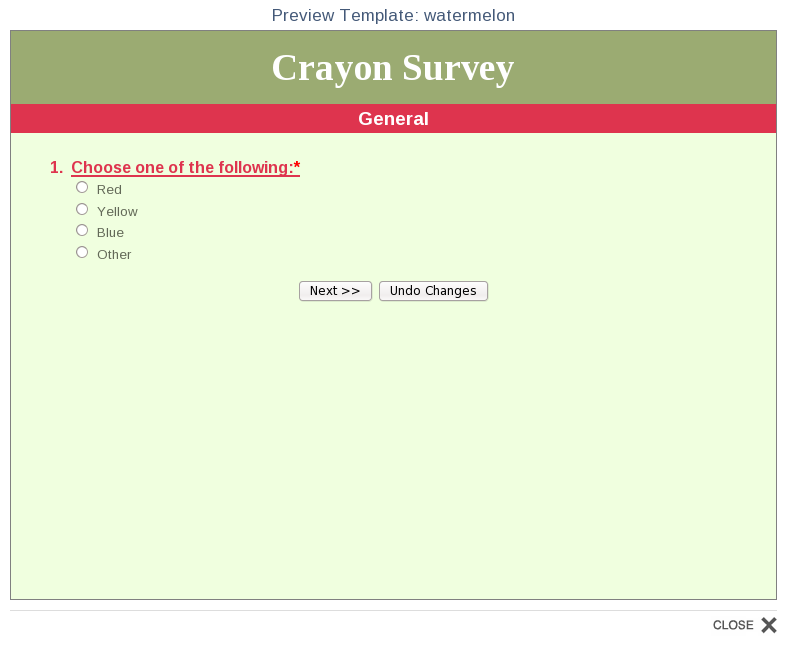
Once you have chosen a style template, you can click Preview to see how it looks.
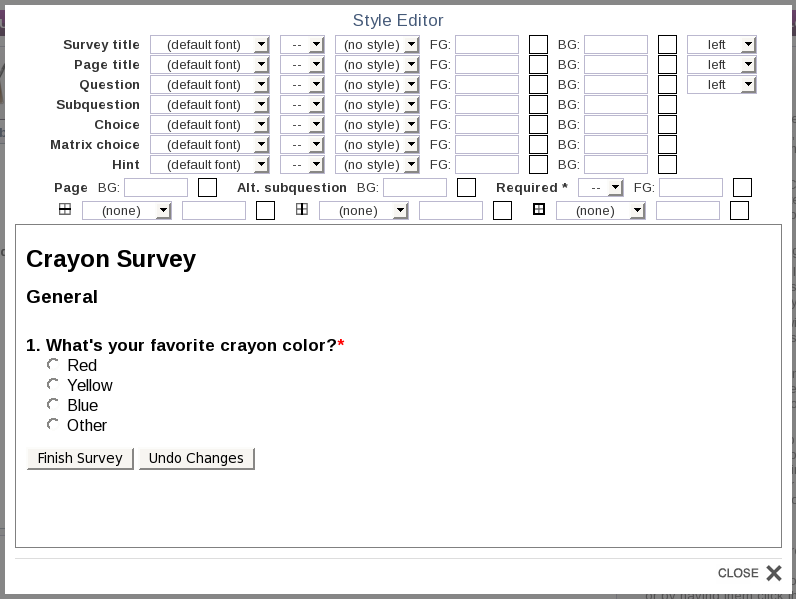
If you choose Use the style editor to create a customized look, you can use our custom style editor to edit page settings such as the font style, font size, font color, and page background color.
If you choose Paste in a stylesheet, you can paste a stylesheet into the textbox beneath it. You can view the base stylesheet that is used for the survey by clicking on Base stylesheet.
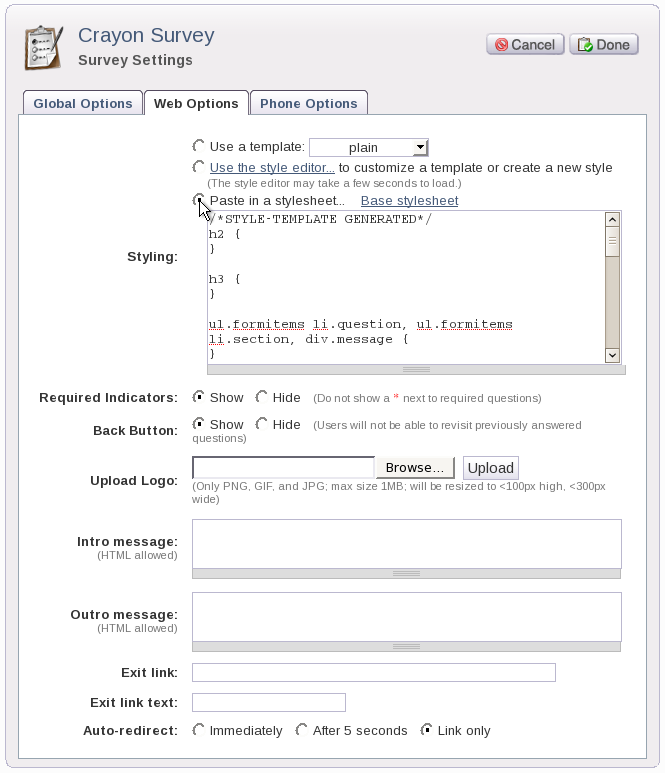
This base stylesheet can be modified and pasted into the textbox to reflect that changes that you made to the base stylesheet.
For Required Indicators, you can change whether you want to show or hide the asterisk for required questions. Select Show if you want an asterisk to appear for required questions or select Hide if you don't want the asterisk to appear. For Back Button, you can hide the Prev<< button from web respondents to prevent them from going back to change answers that could possibly taint responses. To hide this button from respondents, click on the radio button for Hide. If you don't wish to hide this button from respondents, click on the radio button for Show.
For Upload Logo, you can add a PNG, GIF, or JPG file up to 1MB in size to appear as your logo on your survey. For Intro message, you can add text that will appear to users before they take your survey. Similarly, you can add text for Outro message to appear to users after they finish taking your survey. For Exit link, you can add a URL that will direct users there once they complete your survey. For Exit link text, you can enter the text that the user sees before clicking on the exit link. For Auto-redirect, you can select from three choices of when users will be sent to the exit link: Immediately, After 5 seconds, or Link only. Selecting Immediately will instantly send users to the exit link once they complete your survey. Selecting After 5 seconds will redirect users to the exit link five seconds after they complete your survey. Selecting Link only will only redirect users to the exit link if they click on the link to the page.
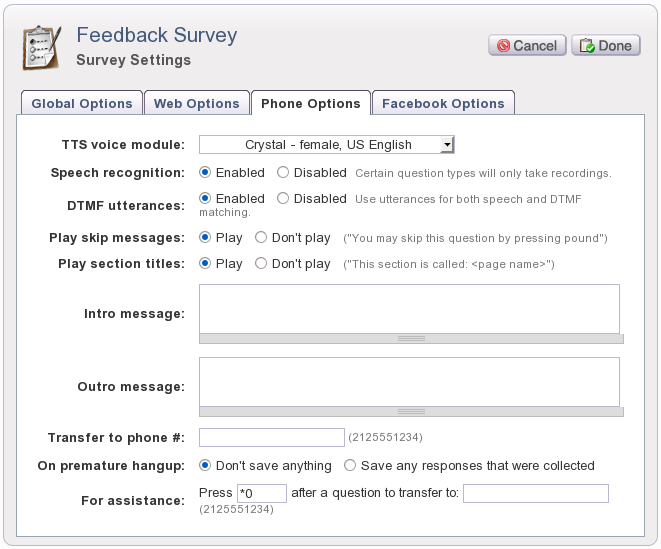
For the phone portion of the survey alone, you can select the text-to-speech voice that you want users to hear over the phone by selecting a name from the TTS voice module drop-down box. Please keep in mind that if you create a foreign language survey, you should upload prerecorded messages in that foreign language for the built-in phrases in your survey since all the built-in phrases are in English. Also, please keep in mind that for speech recognition in your surveys, we currently only offer the following: American English speech recognition, Spanish speech recognition, French-Canadian speech recognition.
The following table shows the available voices that you can use for TTS:
AT&T Natural Voices:
| Language | Male TTS Voice Name | Female TTS Voice Name |
|---|---|---|
| German (de_de) | reiner | klara |
| British English (en_uk) | charles | anjali, audrey |
| American English (en_us) | mel, mike, ray, rich | claire, crystal, julia, lauren |
| Spanish (es_us) | alberto | rosa |
| French (fr_fr) | alain | juliette |
Cepstral Engine (case-sensitive):
| Language | Male TTS Voice Name | Female TTS Voice Name |
|---|---|---|
| British English (en_uk) | Lawrence | Millie |
| American English (en_us) | David, William | Diane |
| Spanish (es_us) | Miguel | Marta |
RealSpeak Engine (case-sensitive):
| Language | Male TTS Voice Name | Female TTS Voice Name |
|---|---|---|
| American English (en-US) | Tom | Jill, Samantha |
| Canadian French (fr-CA) | Felix | Julie |
| Mexican Spanish (es-MX) | Javier | Paulina |
| British English (en-GB) | Daniel | Emily |
| Austrailian English (en-AU) | Lee | Karen |
| Portuguese (pt-PT) | Madalena | |
| Brazilian Portuguese (pt-BR) | Raquel |
For Speech recognition, you have the option of enabling or disabling speech recognition for your phone survey. If you choose to disable speech recognition, then users who take your survey over the phone can only input data using the DTMF keys on their phone for most of the question types. Speech input would be recognized as a noinput by the system. The only question types that would still take speech are: Comments, Full Name, Full Address, and City,State/Province. Also, please note that the responses for these question types will be recordings. As mentioned above, we currently only offer the following for speech recognition: American English speech recognition, Spanish speech recognition, French-Canadian speech recognition.
For DTMF Utterance, you have the option to use utterances for DTMF matching. If you enable this option, you can set the utterance of a Multiple Choice question or a Scale question to an acceptable DTMF value (e.g. 0-9, *) for the user to input. If you disable this option, you will not be able to assign specific DTMF inputsfor the user to input.
You also have the option to allow for skip messages to play for questions that aren't required. For Play skip messages, if you select Play for this option, the user will hear, "You may skip this question by pressing pound." If you select Don't play for this option, the user will not hear this message. For Play section titles, you can choose whether the message, "This section is called", gets played to the respondent during phone surveys. If you click the radio button for Don't play, then this message will not be played to the respondent. If you click the radio button for Play, then this message will be played to the respondent.
For Intro message, you can add text that users will hear over the phone before they take your survey. Similarly, for Outro message, you can add text that users will hear after they finish your survey. Note that once you enter some text in the Intro message and Outro message textboxes, these prompts will be available for you to upload prerecorded messages in the Upload Prerecorded Audio section.
For Transfer to phone #, you can enter a phone number that the user gets transferred to after they complete the survey over the phone. Please keep in mind that you cannot transfer from an 800 number to an 800 number.
For On premature hangup, you have the option of selecting if you want to save the answers given by respondents when they prematurely end the survey by hanging up. If you want these answers to be saved before a premature hangup, click on the radio button for Save any responses that were collected. If not, click on the radio button for Don't save anything. Please note that if you have the option set for Save any responses that were collected, then your responses will be saved even during a premature hangup from transferring to an operator or a premature hangup from a Transfer (phone only) question type. UPDATE (7/01/09): If you set the option for saving answers before a premature hangup, any webservices will execute on the last survey page that the caller reached before hanging up.
For For assistance, there are two textboxes where you can enter what respondents would enter on their phone keypad and what number they would be transferred to for assistance. If you want to inform the respondent about the option of pressing *0 in the middle of the survey to be transferred to an operator, you can use the text/prompt question type or enter some text into the Intro message that would inform the phone respondent about this option. Please be aware, however, that the phone respondent will not be able to dial *0 until after the question has been said. Also, please note that for transfers, you cannot transfer from an 800 number to an 800 number.
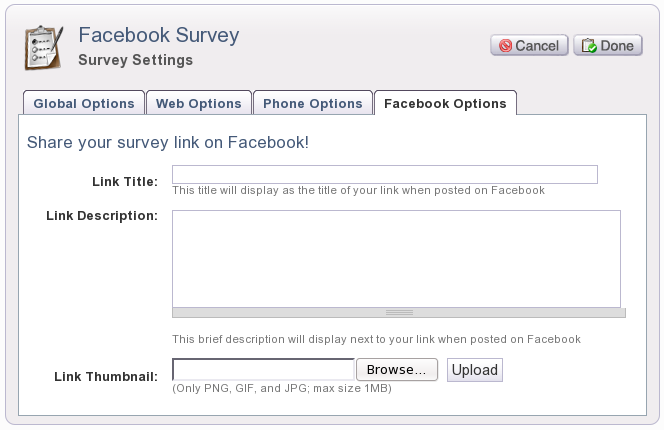
For Facebook Options, you can provide a Link Title, Link Description, and Link Thumbnail for when you share your survey link on Facebook. The Link Title is the title that will display as the title of your link when posted on Facebook. The Link Description is the description that will display next to your survey link in Facebook. The Link Thumbnail is the image that will display next to your survey link in Facebook. Please keep in mind, however, that the Link Thumbnail only allows for a PNG, GIF, or JPG file to be uploaded and has a maximum size of 1MB.
NOTE: Any changes made to the Link Title, Link Description, or Link Thumbnail may not appear in Facebook right away for your survey link due to caching in Facebook.
Once you are finished adjusting your survey settings, you can click on Done or Cancel. Clicking Done will save your survey settings and return you to the My Surveys page. Clicking Cancel will not save your survey settings and return you to My Surveys page.
| 7. Saving and Exiting Pages |
Next |