© 2013 Plum Group, Inc. All rights reserved.
| 3. Deploying a Live Survey |
Next |
You can create outbound call campaigns that will allow you to make outbound calls to respondents to take your survey by phone.
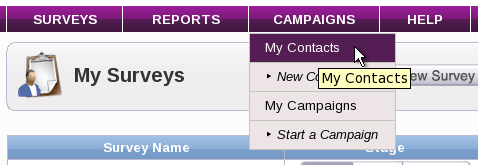
To create a contact, first place your mouse over the "Campaigns" header and click on My Contacts.
Once you're on the My Contacts page, click on the New Contact button to add a new contact.

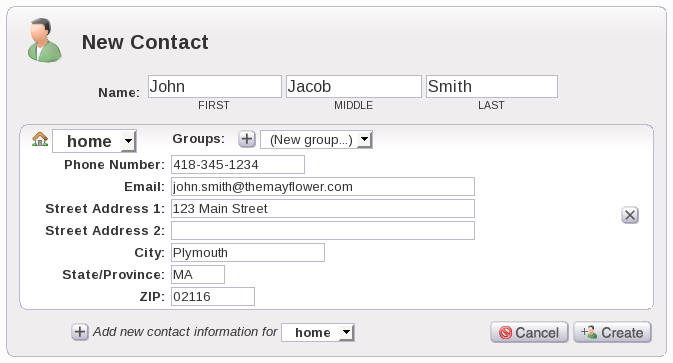
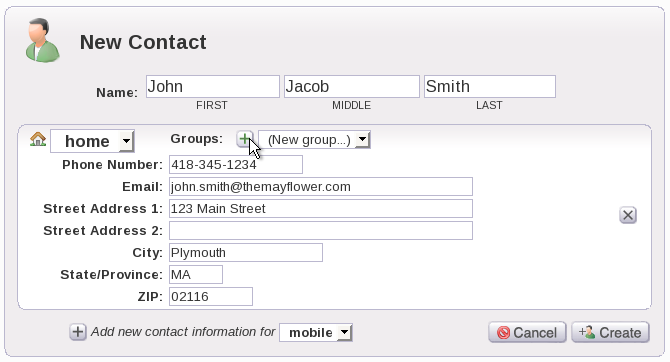
On the New Contact page, you can enter information for your contact such as the contact's first, middle, and last name along with the phone number, e-mail, street address, city, state or province, and zip code.
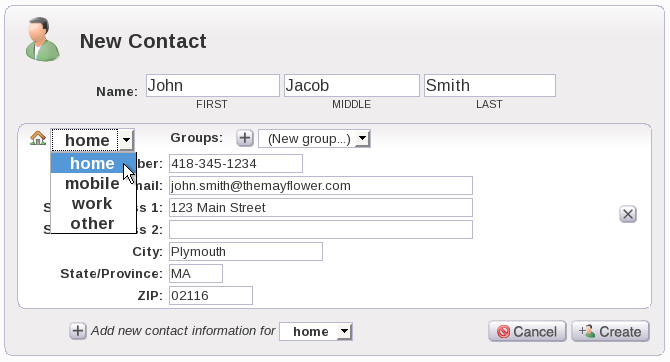
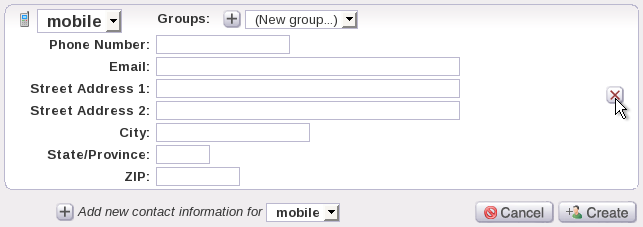
You can also select the type of contact information that you are entering: home, mobile, work, or other. To do this, click on the drop-down box next to the house icon and select the type that you desire.
To add more contact information, select a type of contact information from the drop-down box located to the left of the Cancel button or click on the "Plus" button next to Add new contact information for... if you wish to keep the contact information as home.
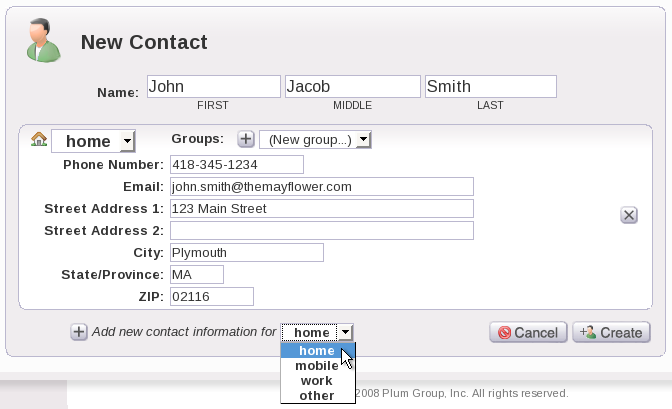
To delete contact information from a contact, you can click on the "X" button located to the right of the contact information.
Once you have finished entering all the contact information for your contact, click on the Create button to create your contact.
To create a group, you can select (New Group...) from the drop-down box next to Groups: and then click the "Plus" button next to it.
From here, a window should appear asking you to enter a name for the new group.
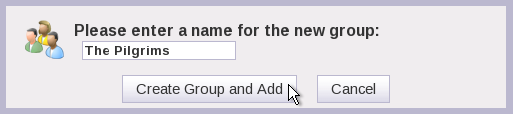
Once you have entered a name for your group, click on the Create Group and Add button to create the group or click on the Cancel button to cancel creating the group.
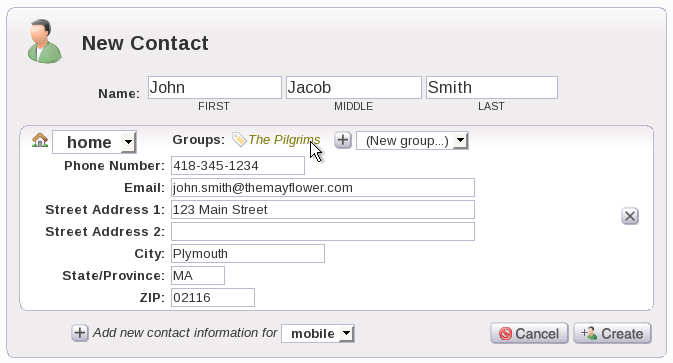
There will be a tag icon and the name of your group for your contact after you have created it.
Similarly, you can also create a group from the My Contacts page. To do this, first select a contact to add to your new group by clicking the checkbox next to the name.
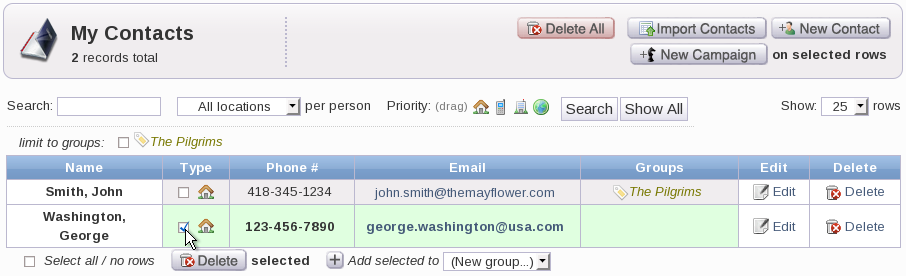
Next, select (New Group...) from the drop-down box next to Add selected to and then click the "Plus" button.
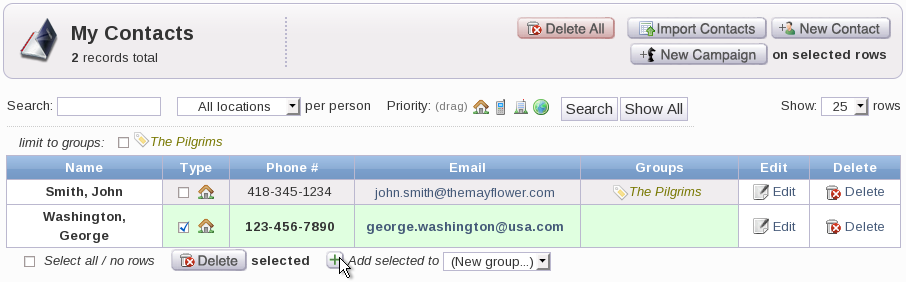
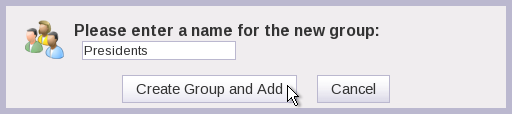
A window should appear asking you to enter a name for the new group. From here, you should enter a name for your new group and then click on the Create Group and Add button to create the group.
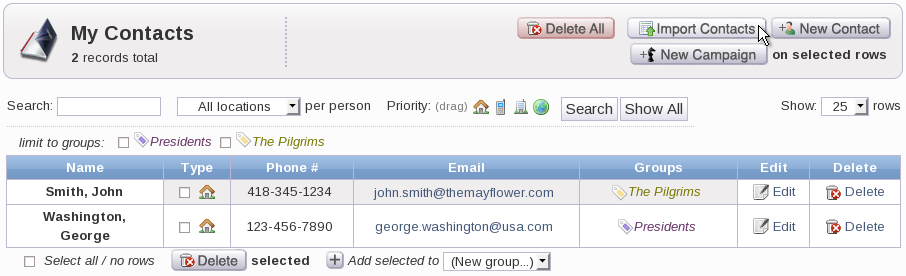
Once you have created the group, a tag icon and the group name will appear under the "Groups" header for the selected contact.
To import a list of contacts from a spreadsheet, first click on the Import Contacts button.
On the Import Contacts page, click the Browse button to select a .csv or .vCard file to upload.
For the format of your .csv, we recommend setting up the following headers within your file: First Name, Last Name, Phone Number, Email, Street Address, City, State/Province, and ZIP. This would make it easier to sort your data into the correct sections of your My Contacts section.

You can then select a group to import all your contacts into by selecting a group from the drop-down box.
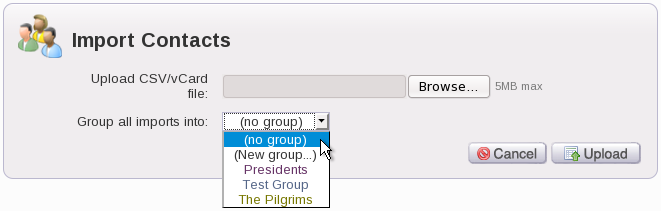
Once you have chosen a file to upload, click the Upload button to upload your contacts.
You will then be led to Step 2, where you can assign fields to each of the rows from your file. To select a field to assign your row, click on the drop-down box under the "Field Name" header.
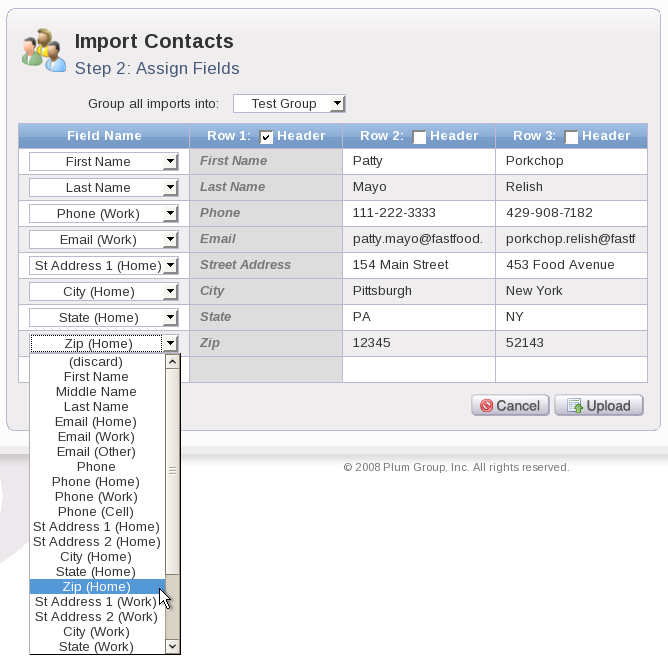
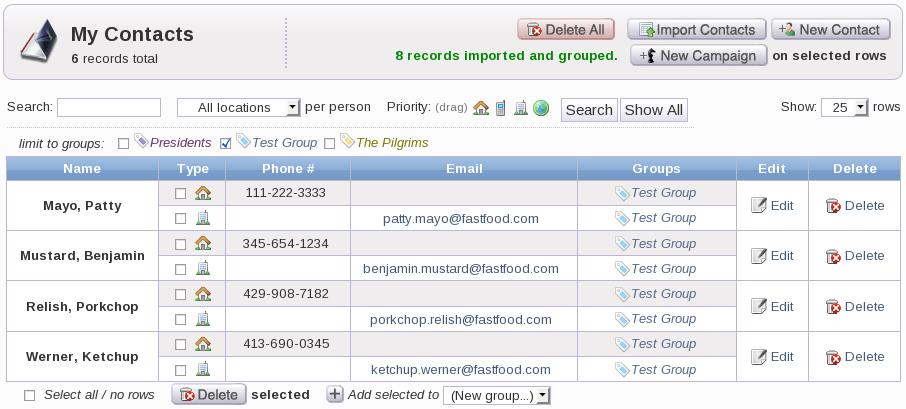
Once you have assigned all of your field names, click the Upload button to complete the upload of your contacts. You should see the new contacts uploaded on your My Contacts page.
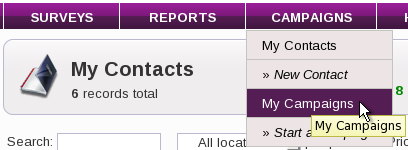
Once you have created a contact list, you can begin creating a campaign for outbound calling. To begin, first click on My Campaigns under the "Campaigns" header.
Once you're on the My Campaigns page, click on the New Campaign button to create a campaign.

Alternatively, from the My Contacts page, you can select which contacts you want to start an outbound campaign with and click on the New Campaign button.
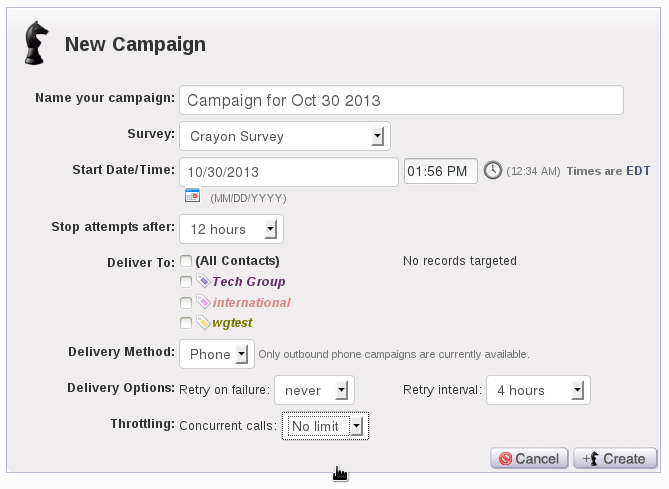
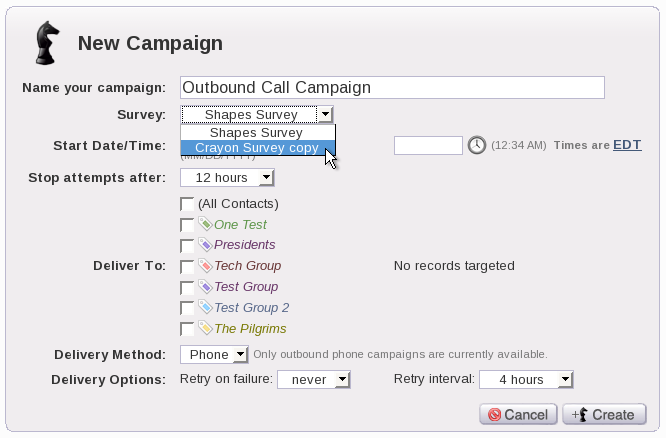
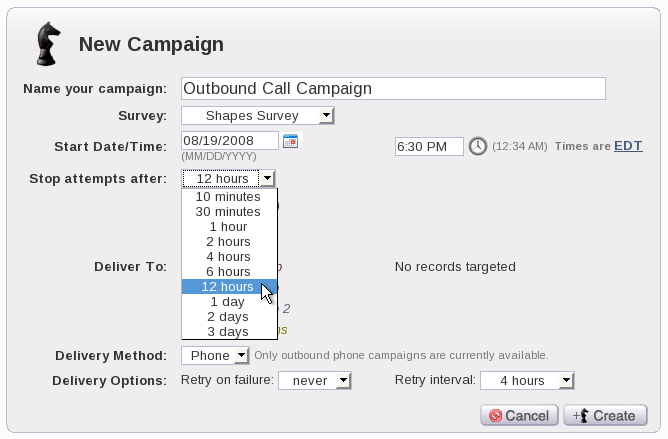
On the New Campaign page, for Name your campaign:, enter the name of your campaign. For Survey:, select a Deployed survey from the drop-down box, which will be the survey that respondents answer to over the phone.
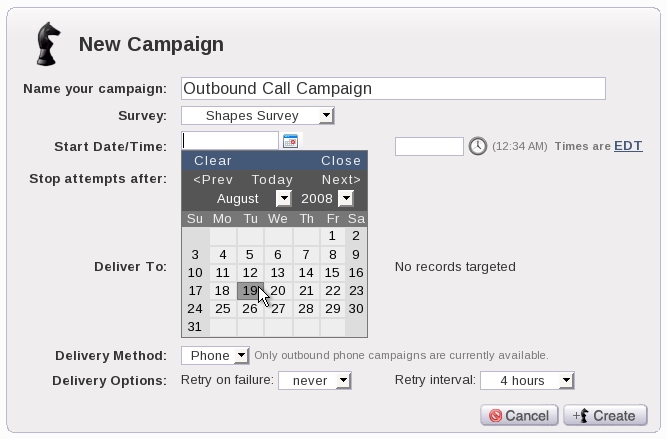
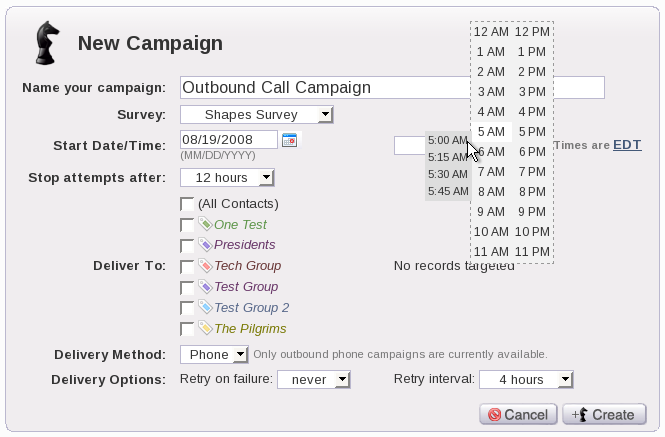
For Start Date/Time:, enter the date and time you want to begin your outbound call campaign in their respective textboxes.
You can also use the calendar interface to select a date:
The time interface could be used to also select a time:
For Stop attempts after:, select the time when you wish to end your outbound campaign. To select a time, click on the drop-down box and select one of the options: 10 minutes, 30 minutes, 1 hour, 2 hours, 4 hours, 6 hours, 12 hours, 1 day, 2 days, or 3 days.
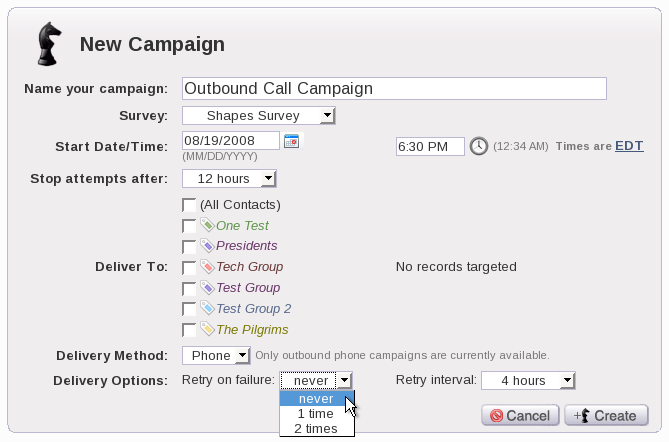
For Deliver To:, select which groups of contacts you wish to take your survey by clicking on the checkboxes.
For Delivery Options:, you can select how many times you want the outbound campaign to retry the delivery of your survey to respondents and the interval for the retries. To select how many times you want to retry the delivery of your survey, click on the drop-down box next to "Retry on failure:" and select one of the following options: never, 1 time, 2 times.
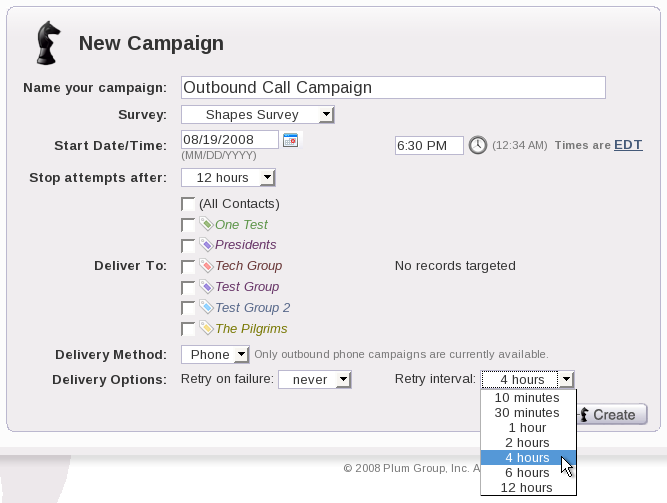
To select the interval time, click on the drop-down box for "Retry interval:" and select from one of the following options: 10 minutes, 30 minutes, 1 hour, 2 hours, 4 hours, 6 hours, 12 hours.
For Throttling:, you can select the number of concurrent calls that would be limited for your outbound campaign.
Once you finish inputting all your settings, click on the Create button to create your campaign.
From here, you can view your Outbound Call Campaign page to track the response status of your contacts and view the responses they gave for your survey.

You can also select which contacts you want to start a new campaign for by clicking the checkbox for each of them and then clicking the New Campaign.
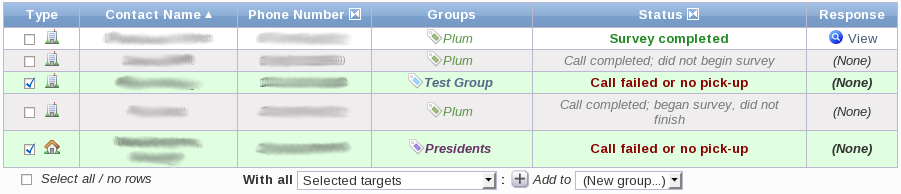
Additionally, you can filter your contacts and add them to a new group by selecting a status from the drop-down box and then clicking the "Plus" button next to "Add to (New Group...)".

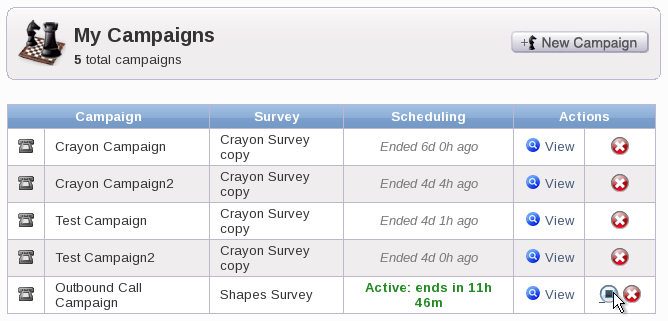
To stop a campaign, click on the "Stop" button under the "Actions" header.
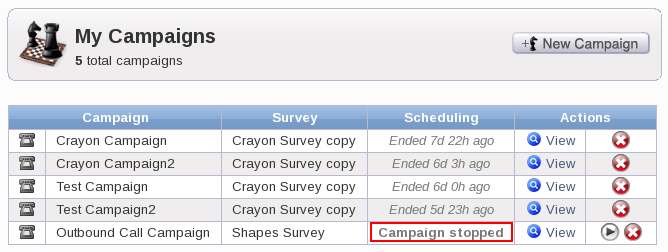
Once you click on the "Stop" button, you should notice that your campaign will say, Campaign Stopped under the "Scheduling" header.
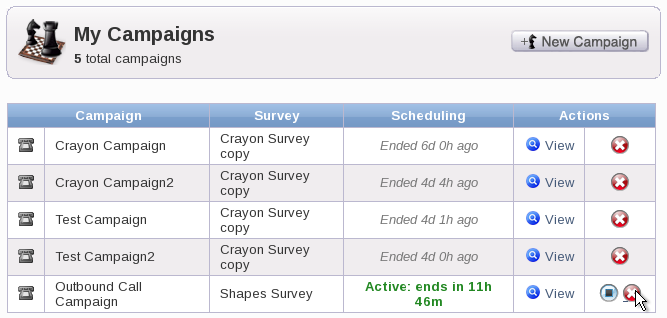
To delete a campaign, click on the "X" button under the "Actions" header.
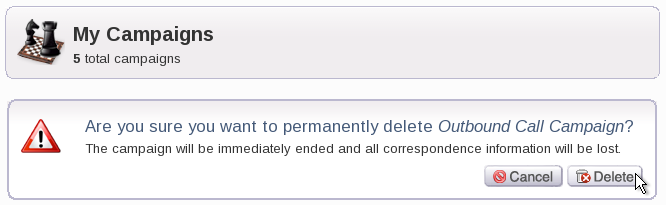
Once you click this button, you will be asked to confirm if you want to delete the campaign. Click on the Delete button to proceed with deleting the campaign.
| 3. Deploying a Live Survey |
Next |